
Trail & Hiking Paw Protection: Build a Vet‑Approved Kit for Adventure Dogs
Trail & Hiking Paw Protection: Build a Vet‑Approved Kit for Adventure Dogs
Steep climbs, sharp scree, and blazing trailheads are hard on canine paws. Smart hikers prepare before lacing up. This blueprint moves beyond basics to give you a precise plan for conditioning, boot selection, trail‑side first aid, and recovery.
Use it to assemble a dependable system—one that prevents injuries, stabilizes issues mid‑hike, and gets your dog back to the trail safely.
Why Trail Paw Protection Matters
Trail miles amplify small mistakes. A missed nail trim or poor boot fit can escalate from mild abrasion to a torn pad that ends your day. Operational canine data shows that paw pads and other soft tissues bear the brunt of field injuries, underlining the need for proactive prevention and informed response[2]. For general context, see our outdoor paw protection overview once you complete this focused blueprint.
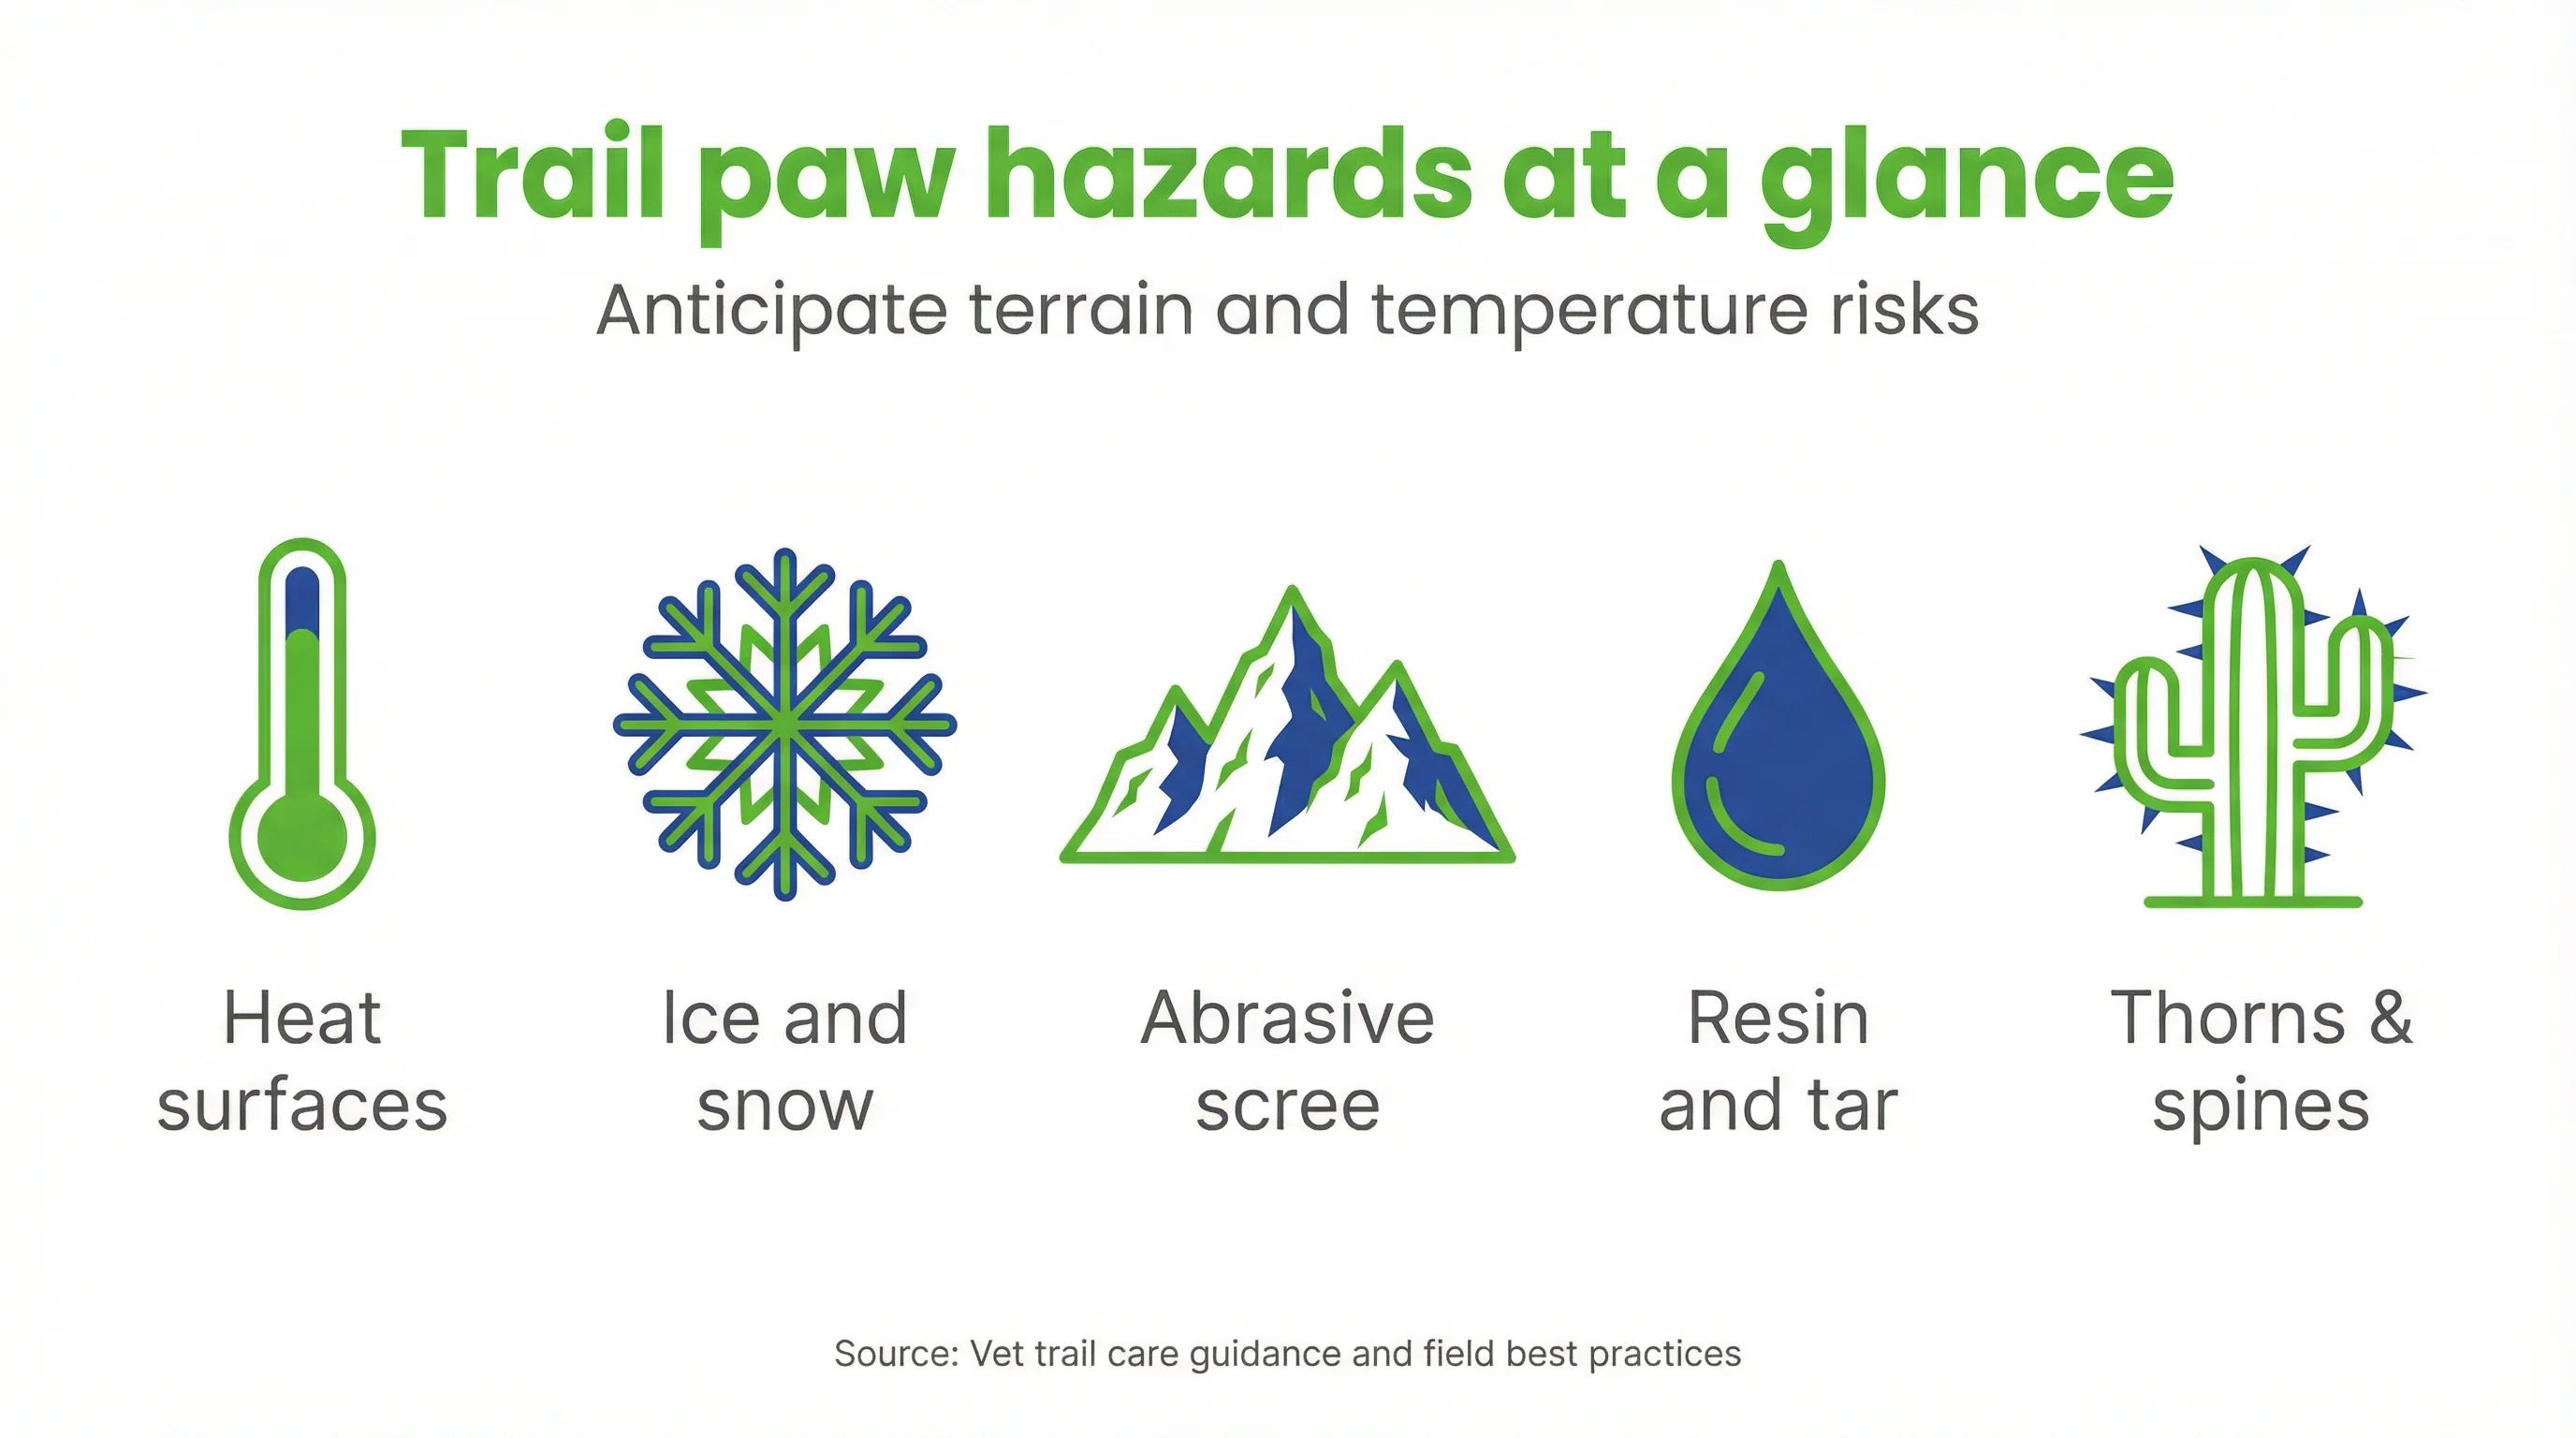
Common trail hazards: heat, ice, scree, resin, and thorns
Summer surfaces exceed safe skin thresholds, winter ice abrades pads, and coarse scree creates micro‑tears. Pine resin traps grit while thorns and cactus spines lodge between toes. Each hazard increases infection risk and delays healing without timely cleaning and coverage[2].
Understanding paw pad anatomy and injury types
Paw pads are tough, but they are not armor. The outer keratinized layer protects fatty cushioning and rich vasculature. Typical trail injuries include abrasions, pad slices, superficial burns or freeze injuries, and nail splits. Early identification prevents deeper tissue damage[3].
Pre‑Trail Conditioning for Tougher, Safer Paws
Conditioning reduces risk more than any single gear choice. Build tolerance, harden pads, and prepare your dog to accept boots calmly. Consistency beats intensity; two short sessions a day often outperform a single long push.
Surface progression and mileage ramp‑up
Start on cool, smooth paths, then progress to mixed gravel and moderate grades. Increase mileage by 10–15% weekly while monitoring gait and post‑walk tenderness. Structured exposure improves pad resilience and reduces injury incidence[3].
Nail, fur, and pad care before season
Trim nails to avoid torque on uneven ground; round sharp edges. Clip excess fur between toes to reduce matting and debris capture. Keep pads clean and moisturized pre‑season—supple skin flexes better and resists cracking under load[3].
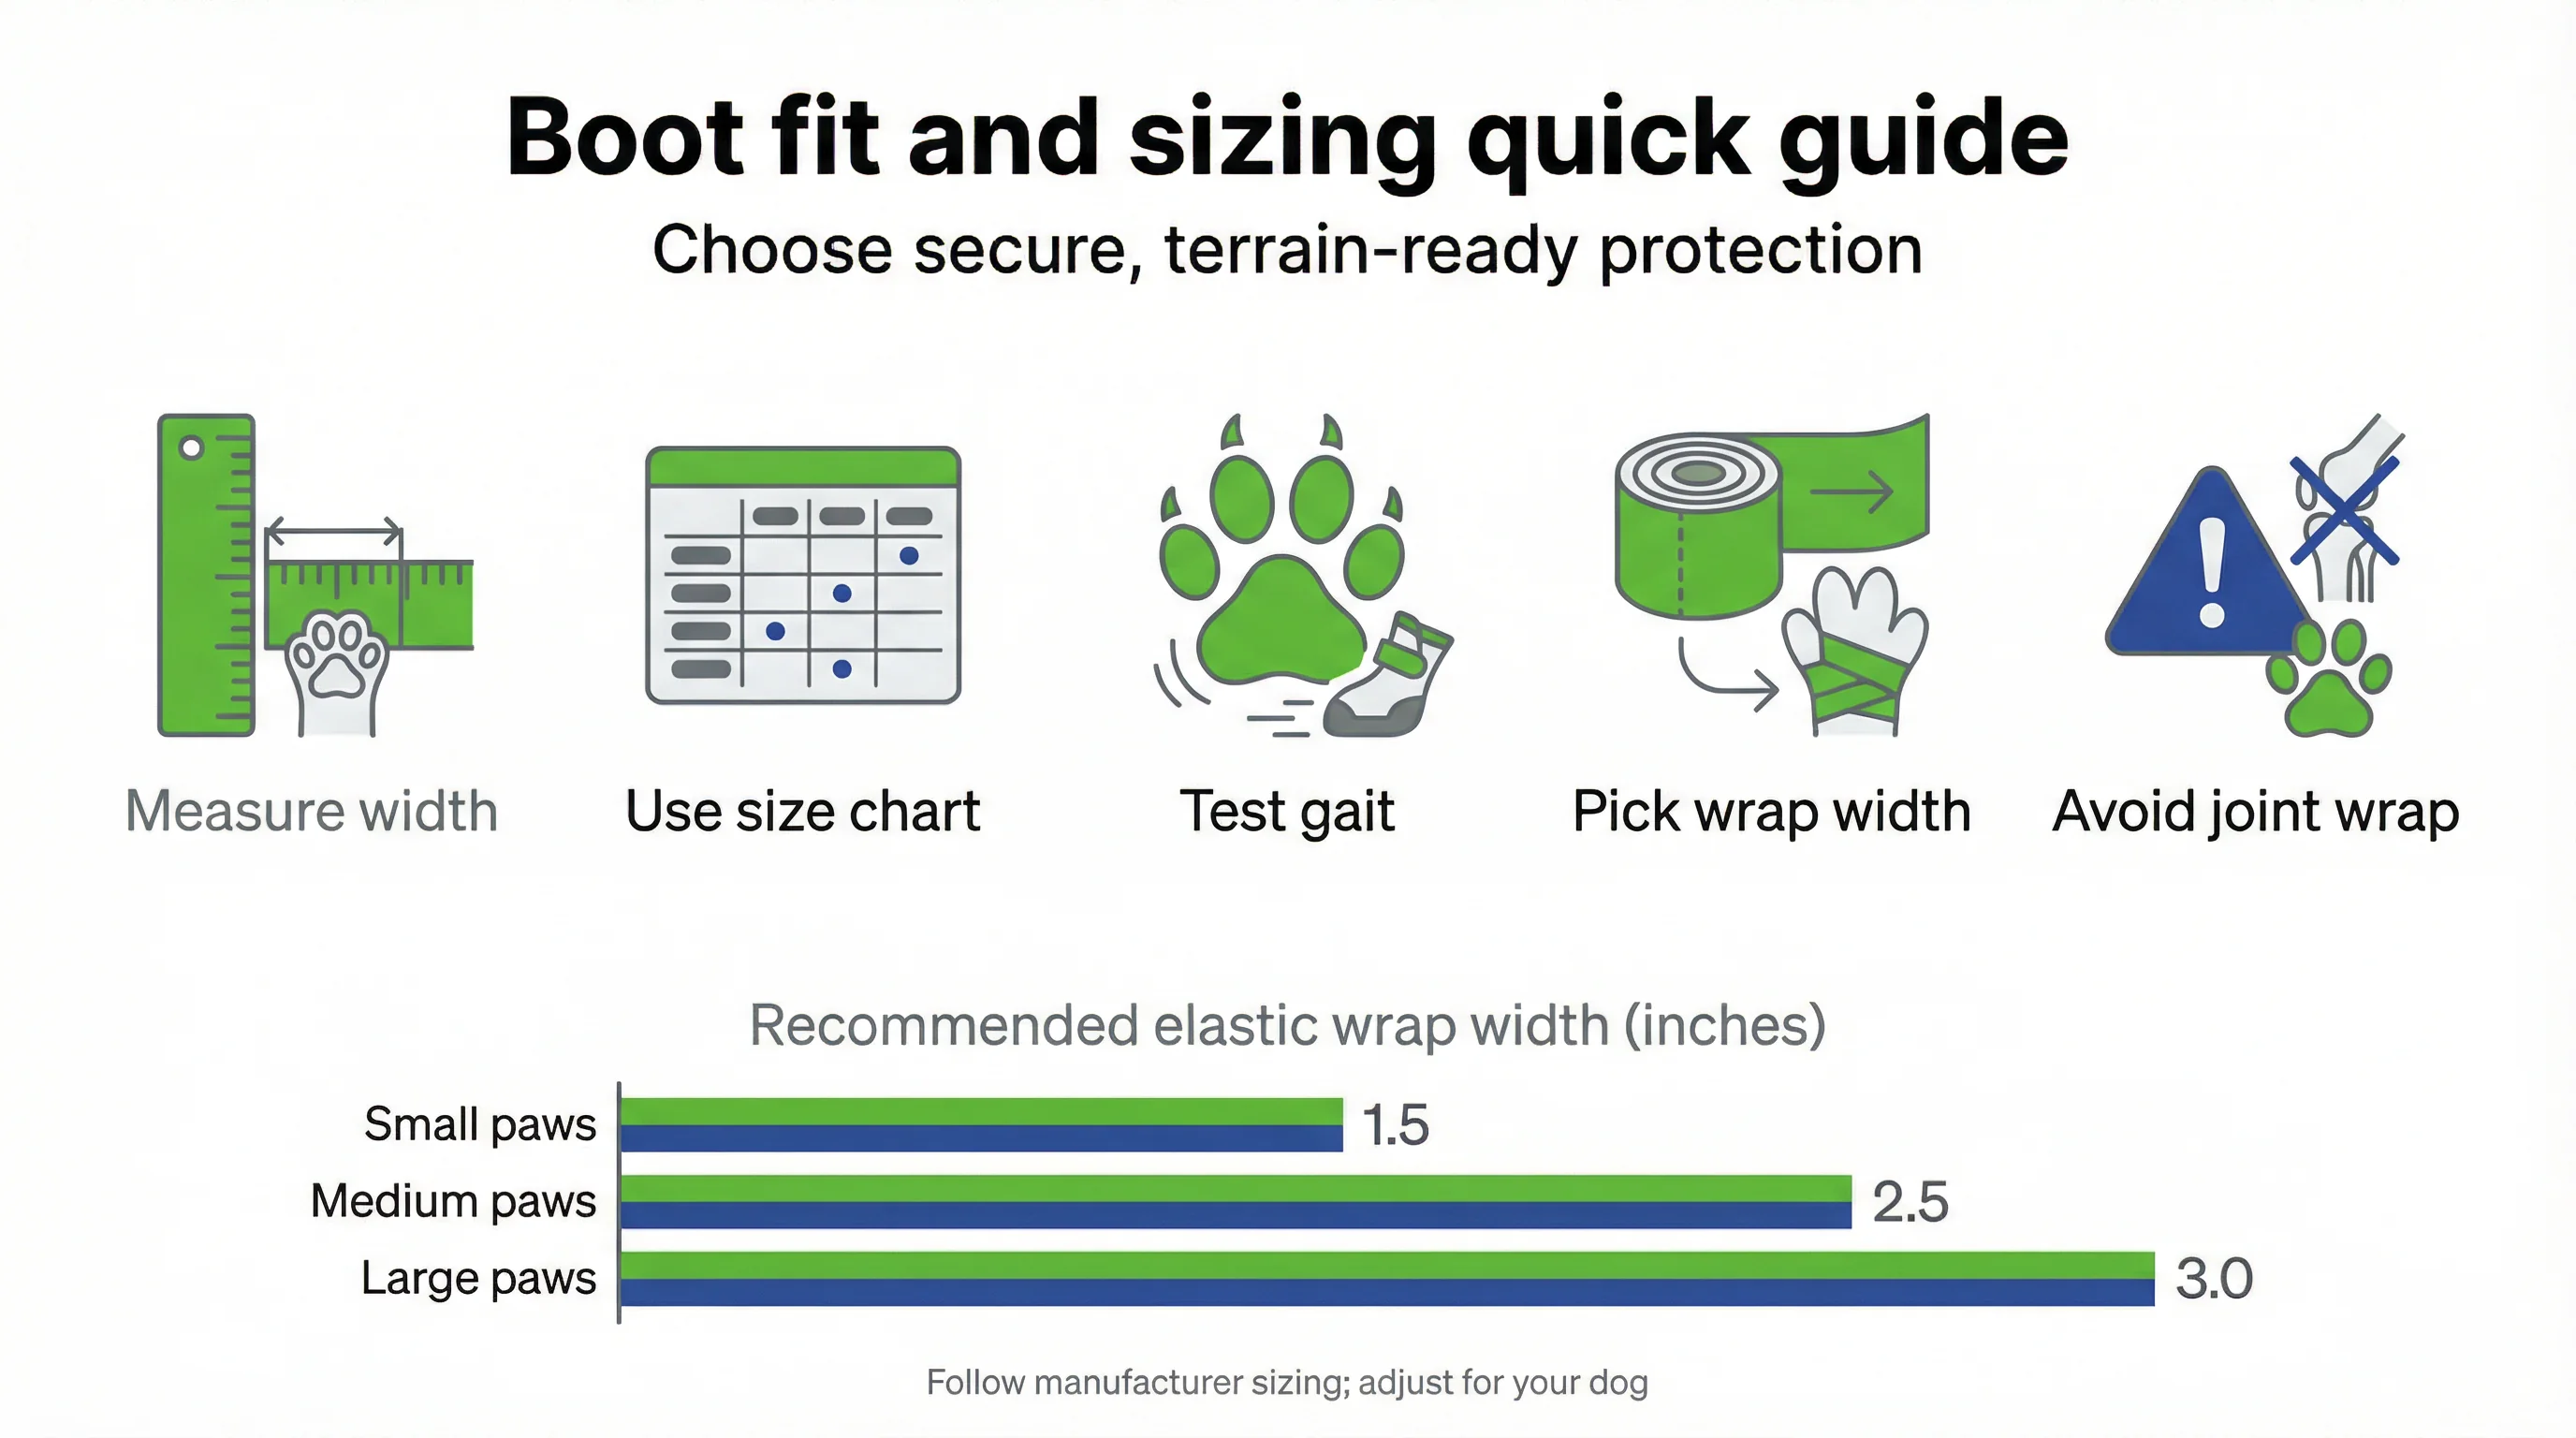
Boot readiness: measure, fit, and break‑in (see Fit and break-in tips for dog boots)
Measure front and rear paws separately; they often differ. Fit for snug security without toe splay. Introduce short indoor sessions and reward calm movement. For step‑by‑step fitting guidance, see Fit and break-in tips for dog boots.
Choosing the Right Boots: Medical vs. Everyday Hikers
Trail paw protection for dogs demands context: medical protection for healing paws, versus everyday dog hiking boots for prevention and traction. Both categories should allow natural gait and disperse load evenly across the paw.
When to use medical dog booties vs. outdoor walkers
Use medical dog booties over dressings after injuries or procedures to keep bandages clean and protected on exits and recovery walks. Choose outdoor paw protection boots for routine hikes, heat/ice mitigation, and grip on scree or wet rock[1].
Sizing, materials, and closure systems that prevent rubs
Prioritize breathable uppers and flexible, grippy soles. Dual closures—an inner cuff and outer strap—reduce slippage on descents. Many pet owners find Urban Walkers III helpful for this task, offering waterproof yet breathable coverage with traction that supports natural footfall on varied terrain.
Gait checks and tolerance training
Watch for shortened stride, paw flicking, or lateral paw rotation; poor fit or stiff soles can alter ground reaction forces. Adjust sizing or model, and rebuild duration gradually to normalize gait and tolerance[1].
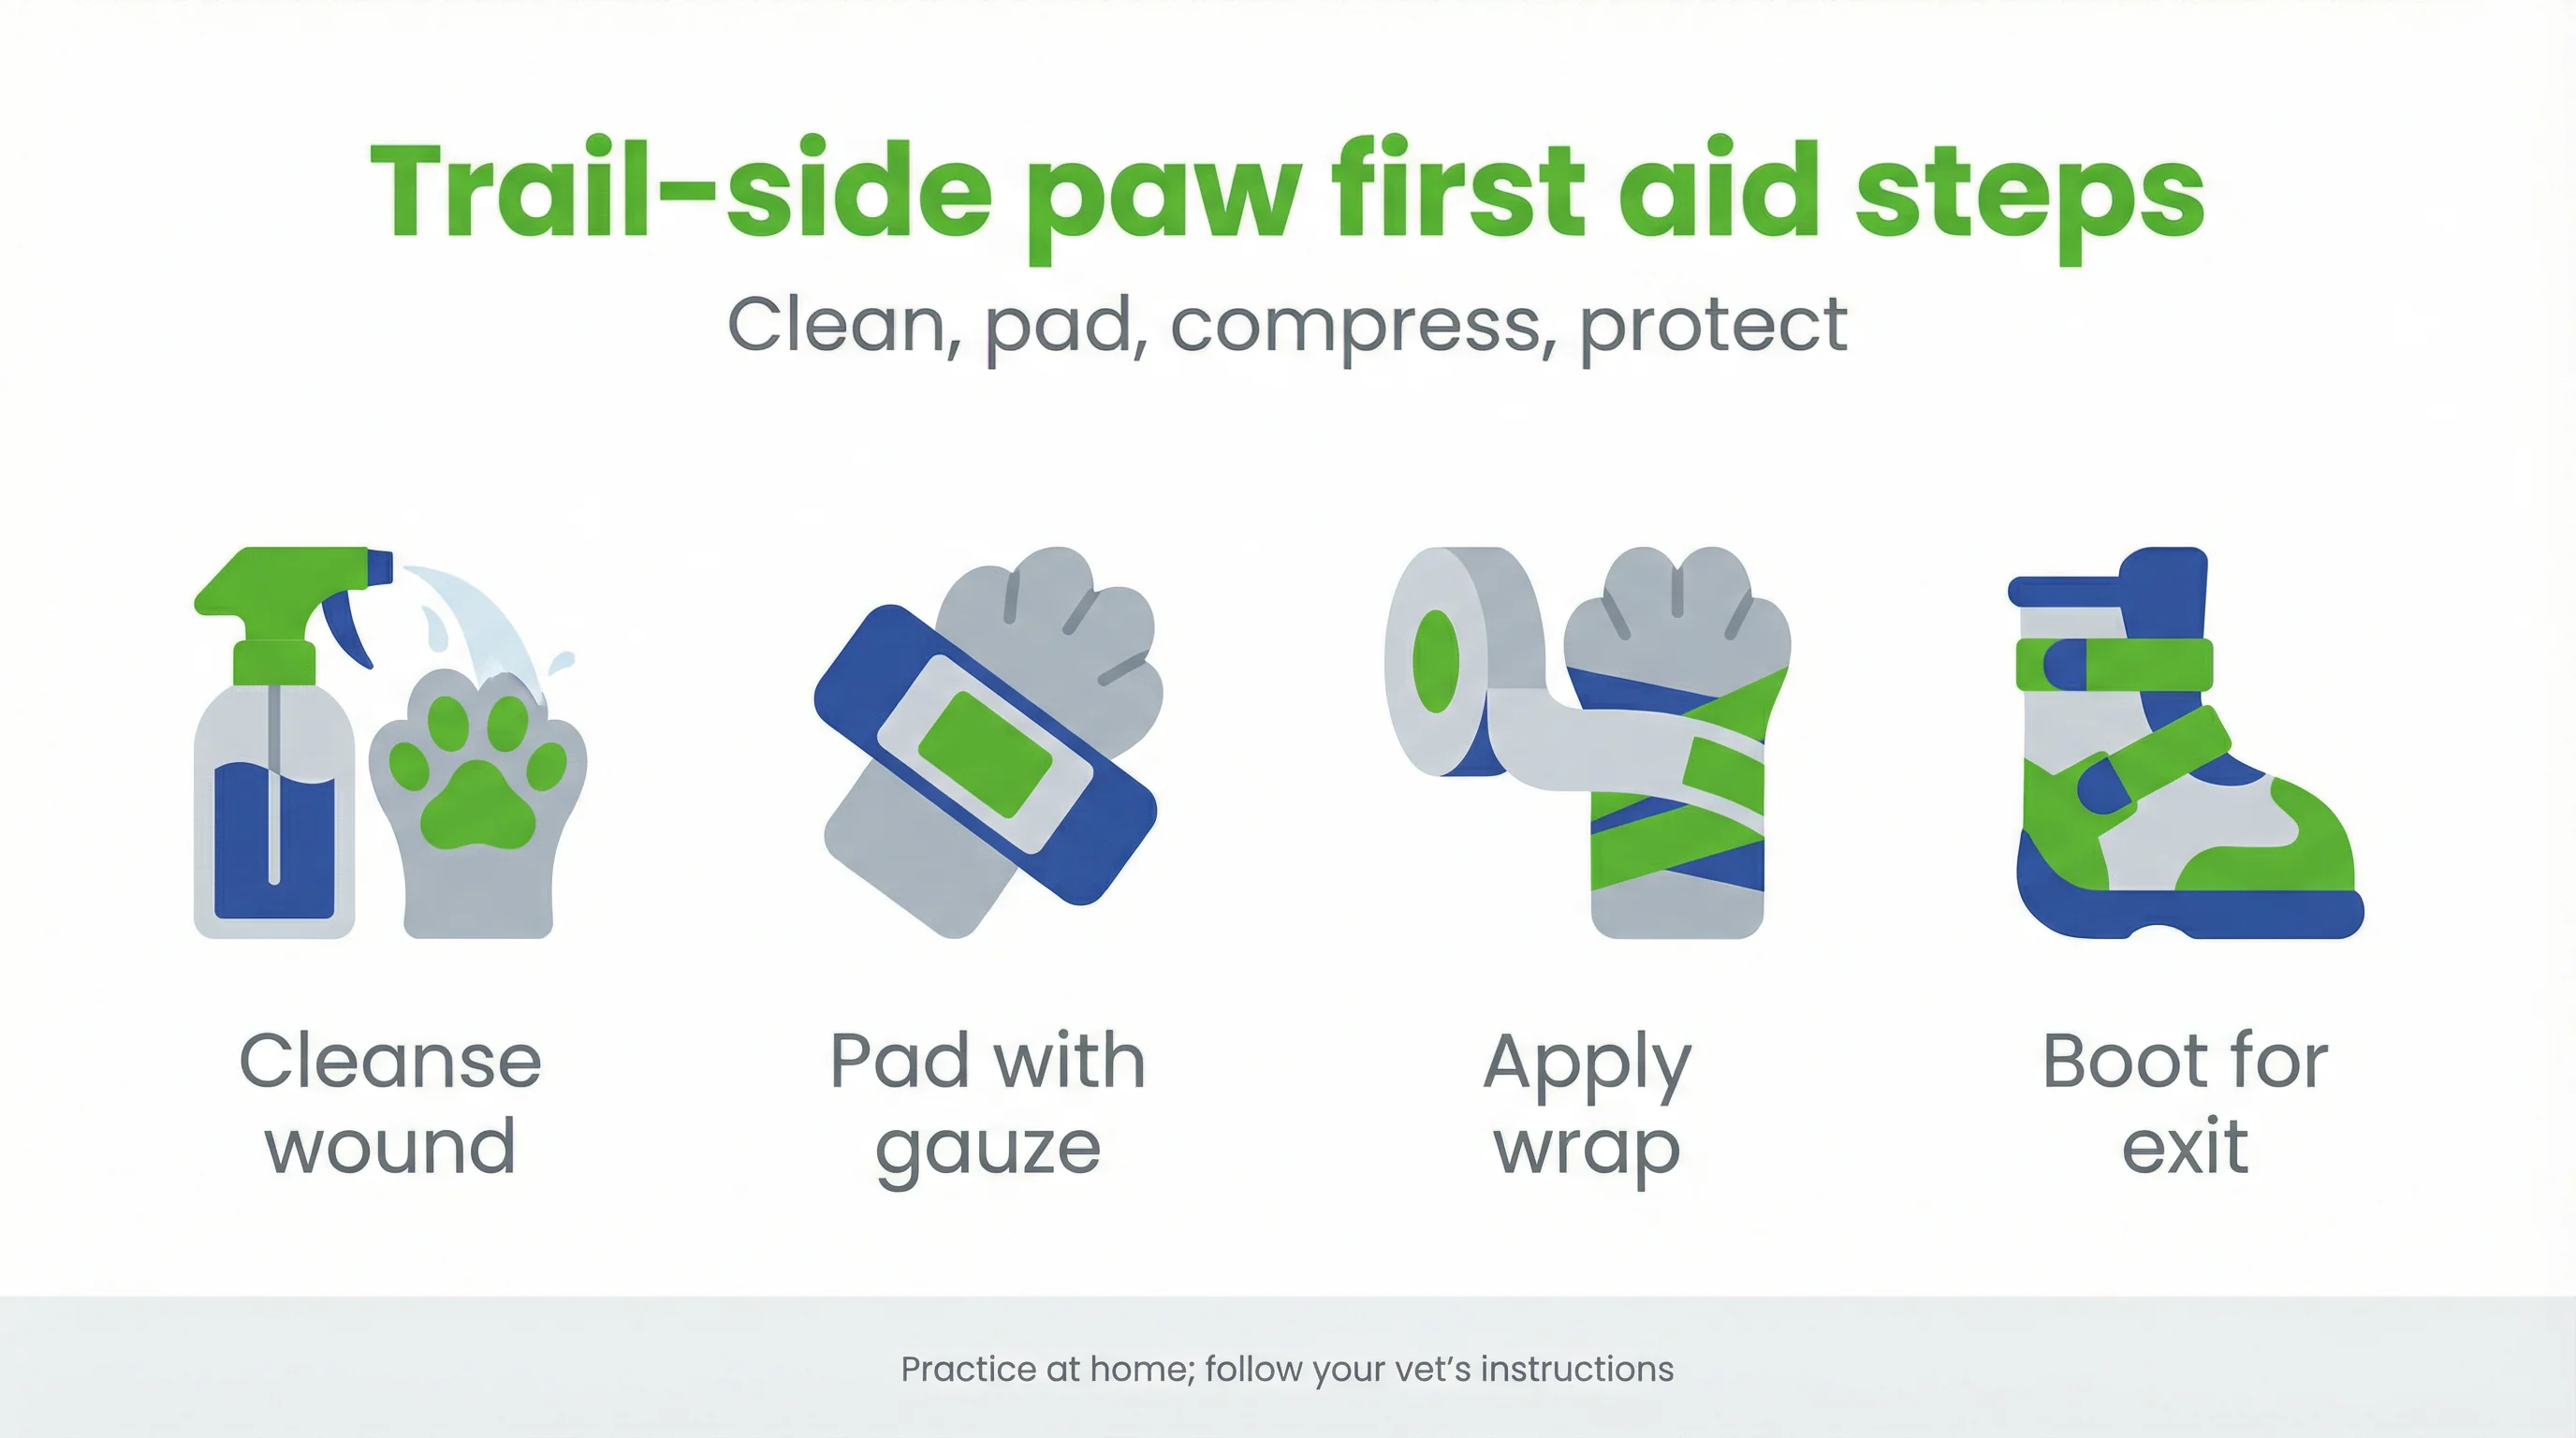
Your Vet‑Approved Trail‑Side First‑Aid System
Effective trail care is simple: clean thoroughly, pad the wound, apply even compression, and protect with a boot for the exit. Practice at home to shorten response time under pressure.
Wound cleaning with HOCl and sterile technique
Irrigate grit and bacteria with an HOCl wound cleanser for dogs using gentle, steady flow. Avoid touching the bottle tip to the wound. Field decontamination improves outcomes when handlers are trained and kits are standardized[4].
Layering gauze and elastic wrap for paws and dewclaws (see Paw pad first aid and bandaging protocol)
Place a non‑stick pad over the lesion, add sterile gauze for absorption, then wrap with elastic bandage to achieve snug, even pressure. Anchor above the carpus to reduce slippage. See our Paw pad first aid and bandaging protocol for detail.
Stabilization for torn pads, split nails, and abrasions
For pad flaps, approximate edges with the dressing; do not trim. For split nails, pad around the quick before wrapping. Mild abrasions often need protection and rest. Boot over the bandage for a clean, controlled exit[2].
Packing List: The Adventure Dog Paw Kit
Build a compact dog first aid kit that prioritizes cleanliness, padding, and protection. Aim for redundancy in critical items like gauze and elastic wrap, and practice accessing each item quickly.
Essential items: HOCl, gauze, elastic wrap, boot spares, tape, tweezers
Pack HOCl wound cleanser, sterile gauze pads and rolls, elastic cohesive wrap, spare paw protection boots, self‑adhesive tape, blunt‑tip scissors, tweezers, and non‑stick pads. These cover cleaning, compression, stabilization, and environmental protection for most trail scenarios.
Nice‑to‑have add‑ons: hot/cold packs, tick tools, saline eye wash
Reusable hot/cold minis aid swelling control at camp. Tick removers speed extraction. Saline eye wash helps flush dust and resin. Add boot liners if your dog is prone to rubbing in warm conditions or long descents.
Lightweight organization and waterproofing tips
Use color‑coded pouches: red for bleeding control, blue for cleaning, black for tools. Double‑bag liquids in a roll‑top dry sack. Store boots toe‑to‑heel in pairs with straps pre‑threaded for fast on‑trail deployment.
On‑Trail Triage: Step‑by‑Step for Common Paw Issues
When something happens, slow down, breathe, and follow a protocol. Quick, methodical actions reduce contamination, control bleeding, and protect tissue until you reach the trailhead.
Abrasion or pad slice
- Rinse dirt with clean water; irrigate with HOCl.
- Pat dry; cover with a non‑stick pad.
- Layer gauze, then elastic wrap with even tension.
- Boot the foot and reassess in 10–15 minutes.
- Exit if bleeding persists or lameness increases[2].
Burned or iced pads
- Move to shade or warmth; avoid further contact with hot pavement or ice.
- Flush with cool (not cold) water; irrigate with HOCl.
- Apply non‑stick pad and light wrap.
- Boot and limit weight‑bearing.
- Monitor for blistering or cracking on exit[3].
Split/broken nail
- Control bleeding with gauze pressure.
- Irrigate surrounding tissue; avoid yanking fragments.
- Pad around the nail to offload pressure.
- Wrap and boot to prevent snagging.
- Plan veterinary follow‑up for exposed quicks[2].
Foreign body removal (thorn, glass, cactus spine)
- Stabilize the paw; use tweezers to remove visible objects.
- Irrigate with HOCl to reduce bioburden.
- Cover with non‑stick pad and gauze if bleeding.
- Apply elastic wrap; boot for protection.
- Watch for swelling or persistent lameness[4].
Trail rule: Clean, compress, cover, and calmly exit. Your dog’s next hike depends on how you handle this one.
Post‑Hike Recovery and Monitoring
Recovery turns today’s effort into tomorrow’s resilience. Establish a repeatable routine that identifies issues early and supports tissue repair without losing training momentum.
Clean, dry, inspect: daily post‑adventure routine
Rinse dust and resin, then dry between toes thoroughly. Inspect pads, webbing, and nails for cracks or tenderness. Log findings to spot patterns on certain trails or temperatures, adjusting routes and gear accordingly[3].
Inflammation support, rest cycles, and re‑booting
Use brief cold therapy after intense descents, then allow 24–48 hours before the next long hike. Re‑introduce boots gradually after any irritation, shifting to softer liners if needed to maintain comfort.
When to see a veterinarian
Seek care for pad flaps, draining wounds, fever, non‑weight‑bearing, or nails with exposed quicks. Prompt evaluation limits complications and speeds return to activity, especially after deep cuts or contaminated injuries[2].
Product Guidance and Sizing Notes
Select gear that matches terrain, temperature, and your dog’s current conditioning. Prioritize fit first, then function, and confirm with a short gait test on similar surfaces before committing to big mileage.
Boot selection by terrain and season
| Terrain/Season | Boot Preference | Notes |
|---|---|---|
| Hot pavement, desert | Breathable, heat‑resistant dog hiking boots | Light uppers; dark soles for traction; monitor heat buildup. |
| Scree, mixed rock | Durable sole, secure dual closure | Prioritize grip and ankle security; carry spares. |
| Snow/ice | Waterproof upper, insulated liner | Prevent ice balls; check strap tension frequently. |
| Injury recovery | medical dog booties | Protect dressings; limit moisture; plan short outings. |
Wrap and gauze sizing for paws vs. legs
For small paws, 1–2 inch gauze and elastic wrap provide fine control. Medium to large paws favor 2–3 inch widths. Avoid wrapping above joints unless anchoring lightly to prevent slippage over fur.
Safe use of protective wraps at home
Wrap with even tension; check toes for warmth and normal color. Replace wet dressings promptly. For step‑by‑step coverage with elastic wrap with gauze and an HOCl cleanser, consult our protocol and adjust based on your veterinarian’s guidance.
Frequently Asked Questions
Do dogs really need boots for hiking?
It depends on terrain, temperature, and your dog’s paw conditioning. Boots help prevent abrasions, burns, and snow/ice injuries, and are essential if your dog has healing paw issues.
What should be in a dog hiking first aid kit for paws?
Include HOCl wound cleanser, sterile gauze, elastic wrap, self‑adhesive tape, spare boots or booties, blunt‑tip scissors, tweezers, and non‑stick pads. Add tick tools and saline if space allows.
How do I clean a paw wound on the trail?
Rinse grit with clean water, irrigate with HOCl, pat dry, apply a non‑stick pad, and secure with gauze and elastic wrap. Cover with a boot to keep the dressing clean until you can reassess.
How can I prevent dog boots from rubbing?
Measure paws accurately, choose breathable materials, and break boots in at home. Use thin liners or vet‑wrap at friction points and check straps for a snug but not constricting fit.
When should I stop the hike for a paw issue?
Stop if you see limping, bleeding that doesn’t slow after dressing, split nails exposing quick, or pad flaps. Stabilize, cover with a boot, and exit to avoid worsening the injury.
For ongoing maintenance and replacement timing after wet or muddy outings, see our guide to Dog Boot Care and Maintenance: Cleaning, Drying, and When to Replace, and remember that seasonal hazards change; revisit Seasonal Paw Hazards: Summer Heat, Winter Salt, and Shoulder-Season Risks when planning routes.
Trail paw protection for dogs is not about luck; it is about systems. Condition consistently, choose boots that preserve natural gait, and carry a small kit you know how to use. Clean, compress, cover, and exit when needed. With deliberate preparation, your dog moves confidently, your responses are calm and effective, and the next summit remains within reach.
References
- B Bieber et al. (2022). Changes in ground reaction forces and center of pressure parameters of paws when wearing dog boots in dogs. Frontiers in veterinary …. View article
- L Palmer (2021). Operational canine. Veterinary Clinics: Small Animal Practice. View article
- I Wiberg (2024). The Influence of Risk Factors on the Health of Dogs' Paws and the Importance of Clinical Evaluation of the Paw in Clinical Practice. 2024 - search.proquest.com. View article
- EB Powell et al. (2019). Handler training improves decontamination of working canines with oil-based exposure in field conditions using disposable kits. Journal of Veterinary …. View article


