
First 24 Hours After a Paw Injury: Stabilize, Protect, and Monitor
First 24 Hours After a Paw Injury: Stabilize, Protect, and Monitor
Introduction: Why the First 24 Hours Matter
Fresh paw injuries demand calm, clear action. The first day shapes comfort, cleanliness, and healing momentum.
This guide offers an hour‑by‑hour plan for paw cut first aid, torn paw pad treatment, and dog nail injury at home. You will learn immediate stabilization steps, protection options, and smart thresholds for veterinary care.
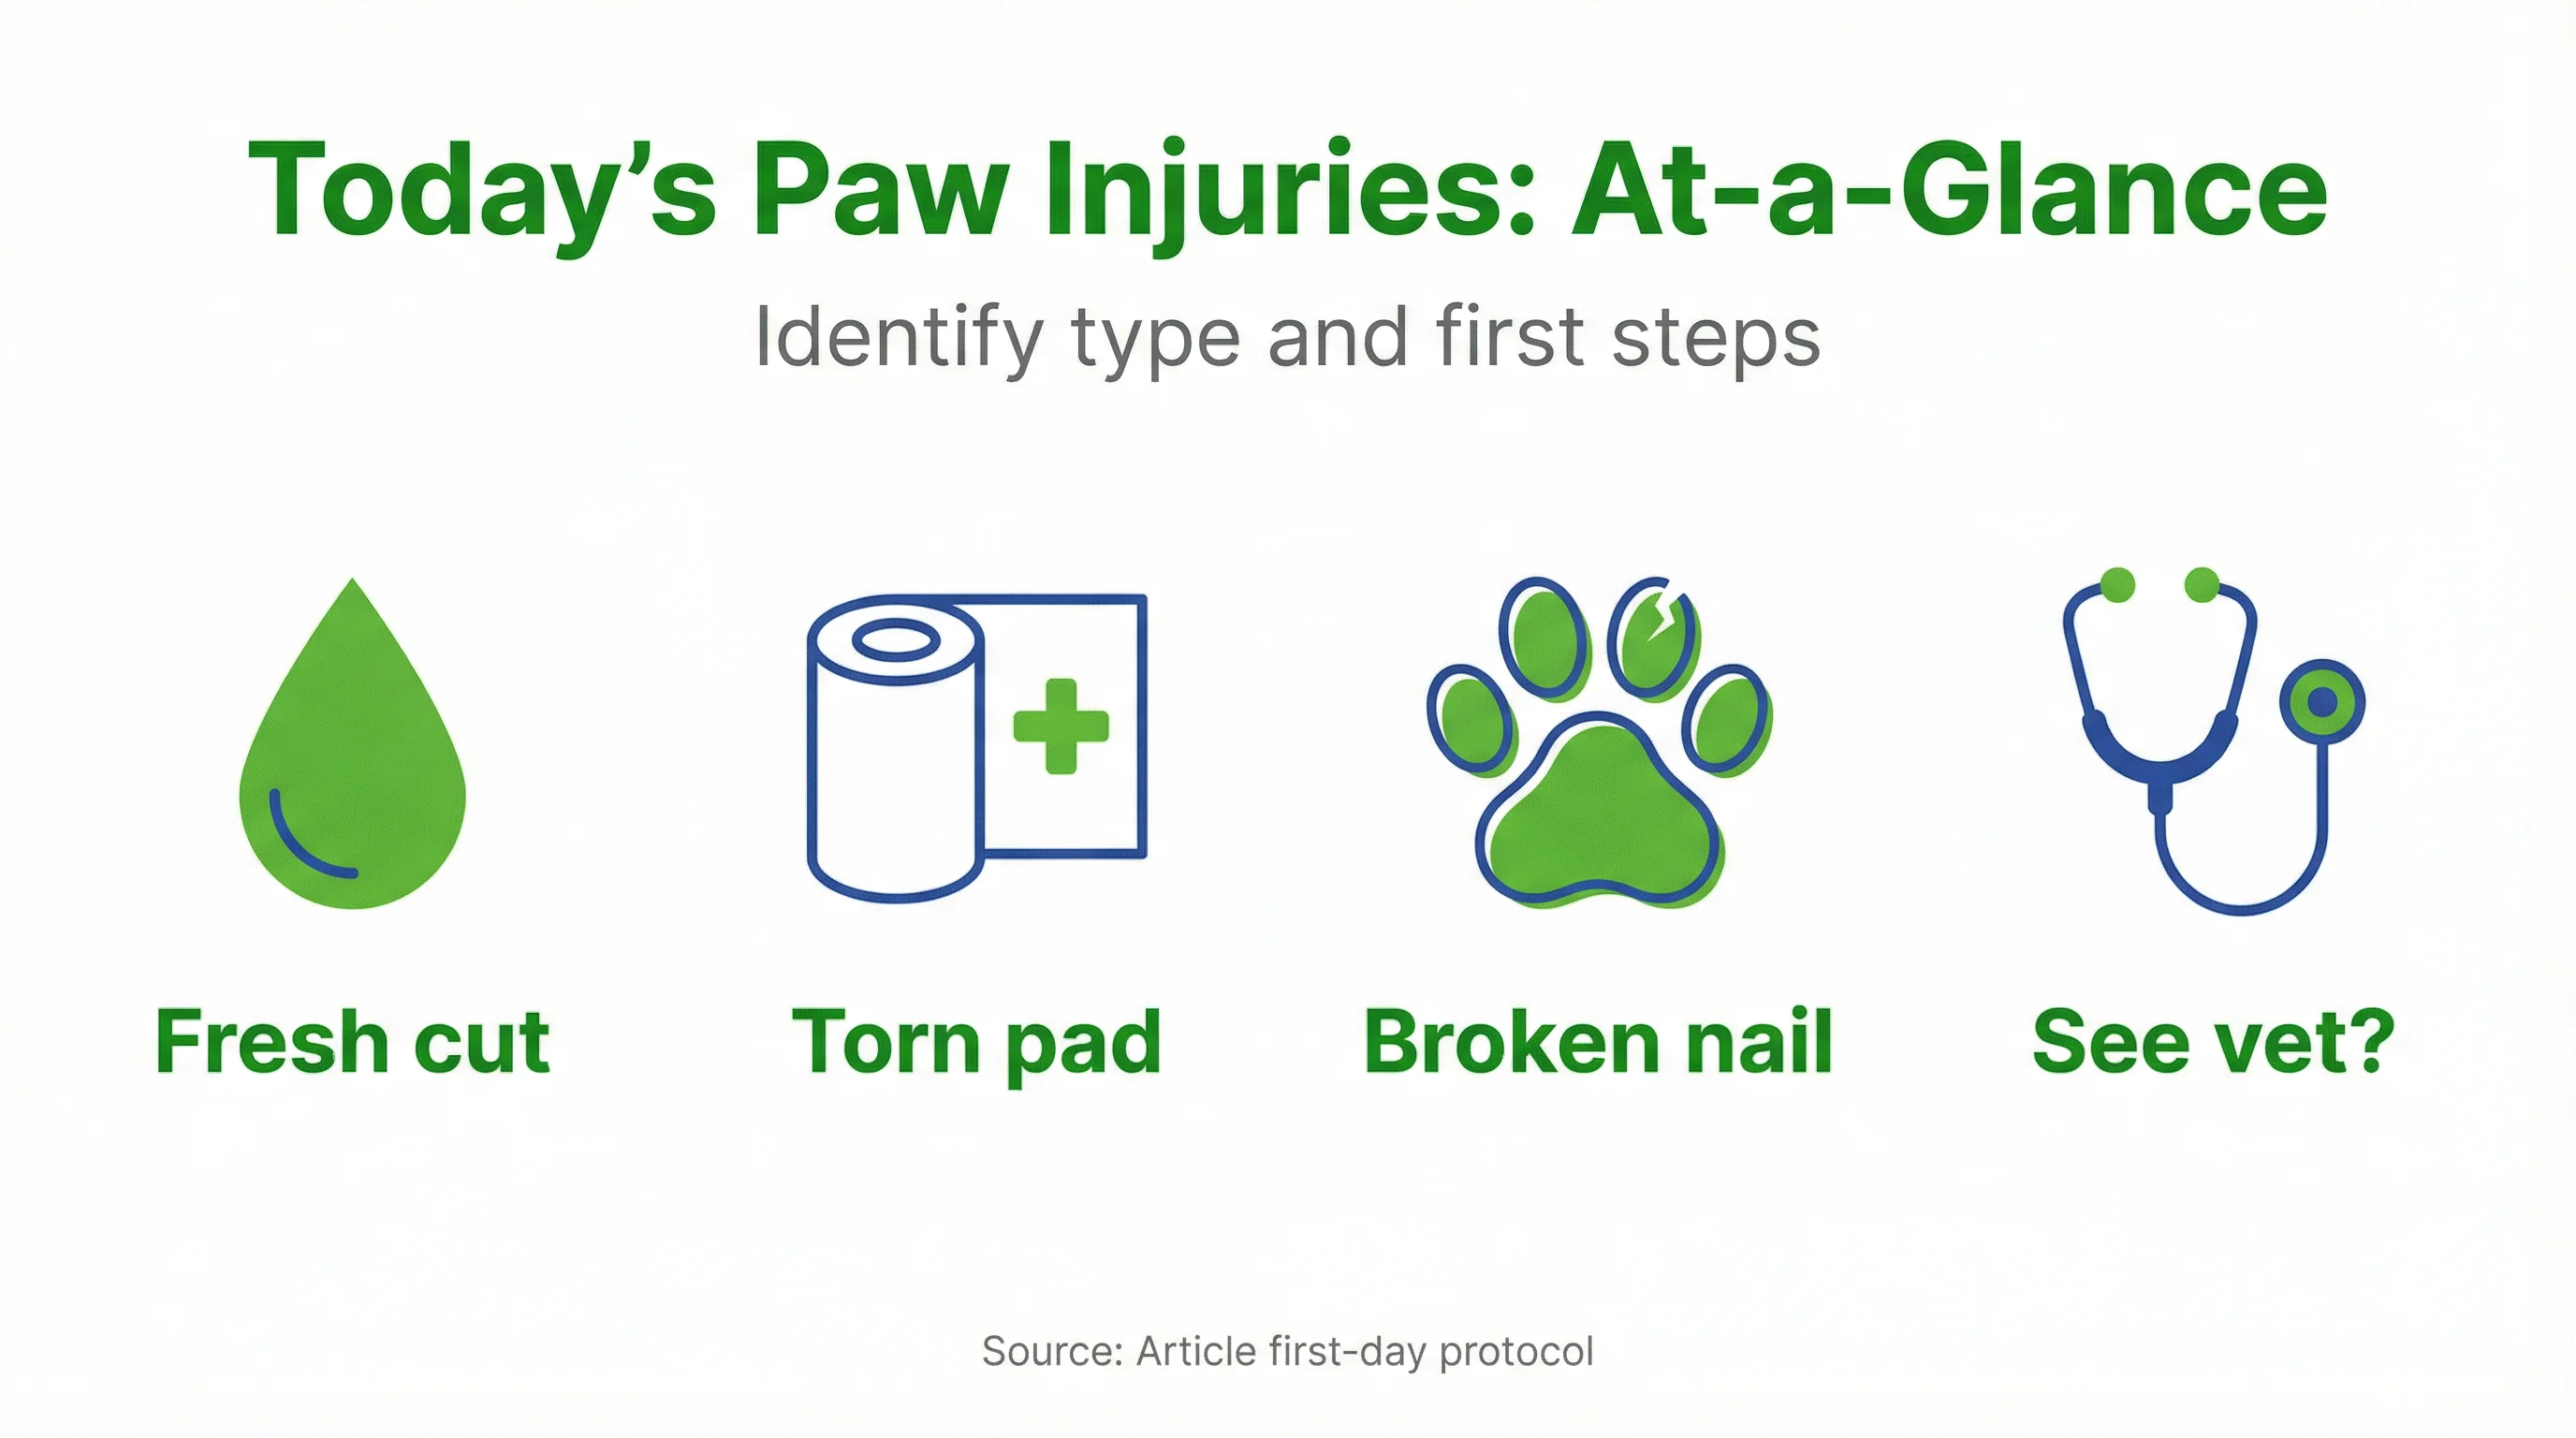
Focused Scenario: Fresh Cut, Torn Pad, or Broken Nail
This plan targets acute injuries that happened today. Think sharp cuts, pad abrasions or tears, and split or ripped nails.
We focus on dog paw injury care you can manage at home while deciding when a vet visit is prudent. The steps balance bleeding control, gentle cleaning, protection, and careful monitoring.
How This Fits with the Injury Recovery Orientation Hub
These first 24 hours build a safe foundation for recovery. Short walks, protected rest, and clean dressings reduce setbacks.
Use this protocol as your immediate playbook, then transition to longer‑term conditioning, surface management, and prevention with guidance from our broader recovery resources.
Hour‑by‑Hour Plan: Stabilize, Protect, and Monitor (0–24 h)
Hour 0–1: Control Bleeding and Initial Cleaning With Non‑Irritating Solution
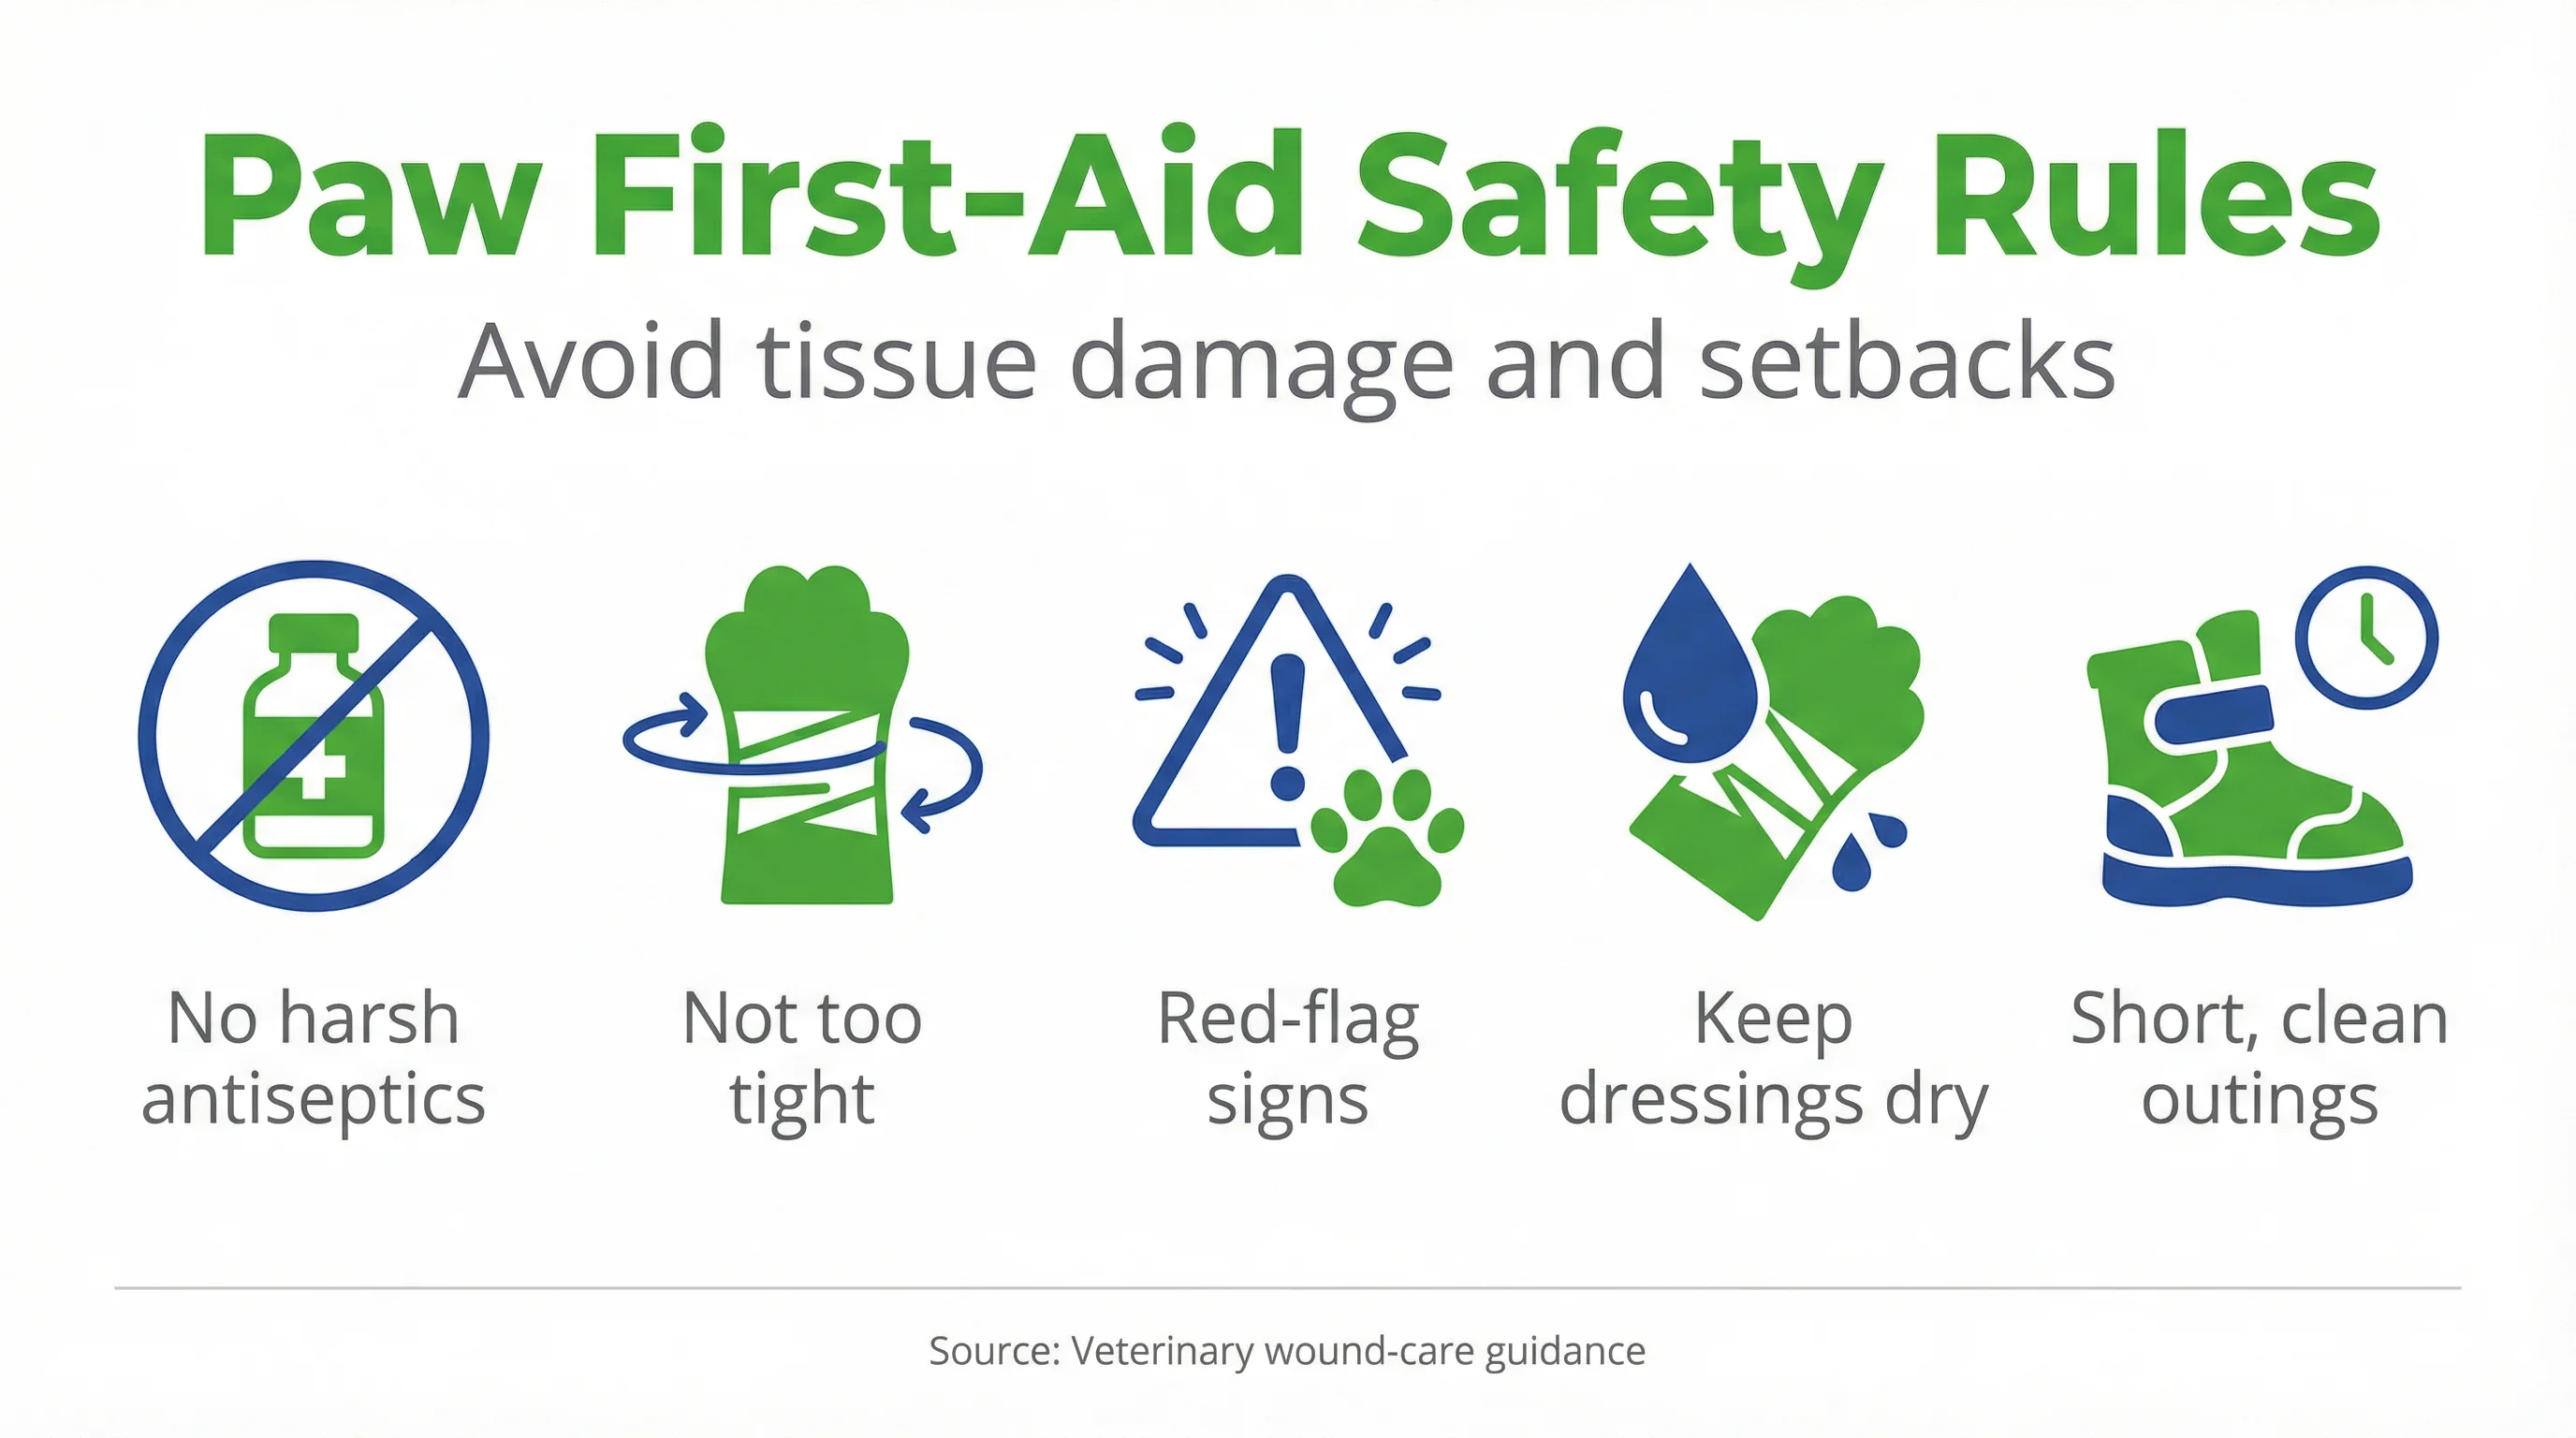
Apply firm, steady pressure using clean gauze for 5–10 minutes without lifting to check. Elevate the limb if feasible. Once bleeding slows, rinse debris with cool, running water or a pet‑safe hypochlorous acid (HOCl) cleanser. Avoid hydrogen peroxide, alcohol, or povidone‑iodine unless advised. Modern local wound care favors gentle, non‑cytotoxic cleaning to protect healthy tissue and reduce contamination risk.[2] For step‑by‑step HOCl use at home, see Cleaning Dog Wounds at Home with HOCl: Step‑by‑Step and Safety Checks.
Hour 1–3: Temporary Bandage and Non‑Slip Protection
Dry the paw thoroughly. Place a sterile non‑stick pad over the wound. Wrap with light gauze, then add a thin elastic wrap for gentle compression without constriction. Cover with a breathable medical dog bootie or protective sock to deter slipping. Keep your dog leashed and confined to rest areas. Brief potty breaks only on clean, dry surfaces.
Hour 3–12: Rest, Dressing Changes, and Lick Management
Enforce crate rest or a quiet room. Check for strike‑through bleeding and seepage every 3–4 hours. Replace damp or soiled dressings promptly. Prevent licking with a medical boot, soft cone, or recovery collar. Offer mental enrichment that does not increase activity. Maintain hydration and normal meals unless nausea or pain suggests otherwise.
Hour 12–24: Bandage Review, Short Walks, and Pain Re‑Assessment
Reevaluate the bandage fit and dryness. Allow two to three five‑minute leash walks on dry, smooth surfaces with boot protection. Look for pain signals: reluctance to bear weight, sudden yelps, or persistent licking. Deep, gaping, or contaminated wounds warrant veterinary review. Early, appropriate local care can support better outcomes in acute injuries.[1]
Quick Decision Guide: If X Happens, Do Y
- If bleeding does not slow after 10–15 minutes of pressure, maintain pressure and seek urgent veterinary care.
- If the pad tear is deep with gaping edges, minimize walking, keep it clean and protected, and contact your veterinarian within hours.
- If a nail is ripped with exposed quick or persistent bleeding, stabilize with a non‑stick pad, limit activity, and arrange a veterinary visit soon.
- If your dog refuses to bear weight after initial rest, restrict movement and call your veterinarian the same day.
- If bandage becomes wet or soiled, change it immediately and reassess for drainage, odor, or swelling.
- If pain worsens overnight, avoid additional home medications and consult your veterinarian for safe analgesic options.
Practical Safety Boundaries
What Not to Do at Home
Do not use hydrogen peroxide, alcohol, or strong iodine on fresh paw tissue; these agents may damage healthy cells and delay repair.[2] Do not wrap tightly or leave toes cold, pale, or swollen. Avoid adhesive directly on fur or skin. Do not let your dog run, jump, or swim. Do not trim ragged pad tissue or torn nails aggressively at home.
Signals for Urgent Veterinary Attention
Seek prompt care for persistent bleeding, deep lacerations, foreign material under the pad, exposed bone or nail bed, significant swelling, foul odor, fever, or sudden lameness escalation. In sport or high‑drive dogs, under‑recognizing pain can delay diagnosis; timely evaluation helps reduce complications and downtime.[3]
How to Protect the Wound Without Delaying Healing
Choosing Medical Boots vs. Elastic Bandages
Elastic wraps provide light compression and dressing stability. Boots add traction, moisture control, and lick deterrence during short outings. For indoor rest, a breathable bandage may be sufficient if your dog leaves it alone. For outdoor bathroom breaks, medical dog booties help keep dressings clean and dry. For sizing, wear schedules, and fit trade‑offs, see Dog Boots for Recovery vs. Outdoor Use: Fit, Sizing, and Wear Schedules. Many pet owners find Pet Injury Duo Pack helpful for this task.
Keeping the Paw Dry and Breathable
Moisture control is essential. Use non‑stick pads and light layers that allow airflow. Replace any damp dressings quickly. Outdoors, cover with a boot and remove it immediately after returning inside. Avoid plastic wraps that trap moisture. For safe, step‑by‑step wrap techniques, review When and How to Use Elastic Leg Bandages on Dogs.
Monitoring and Expected Progress
What to Observe at 7–14 Days
Minor cuts may close within one to two weeks with clean, stable coverage. Expect reduced tenderness, less licking, and pink, intact tissue edges. Persistent drainage, redness, or odor suggests infection risk and warrants veterinary evaluation. Gradually extend leashed walks if comfort allows.
What to Observe at 4–8 Weeks
Pad tissue strengthens slowly. Full resilience often requires several weeks of protected use. Increase activity in stages, watch traction on rough surfaces, and protect during high‑risk outings. If lameness, cracking, or recurrent sores appear, consult your veterinarian for reassessment. See long‑term recovery steps.
State of the Evidence: What We Know and What Is Under Study
Cleaning With HOCl and Biofilm Control
Veterinary wound care increasingly favors non‑cytotoxic cleansers like HOCl to reduce microbial load while sparing viable tissue. This approach may help limit biofilm formation and support granulation across wound types.[2] Moisture‑balancing dressings, including select hydrogels, have shown favorable healing and safety profiles across diverse skin wounds, though individual responses vary.[4]
Support With Turmeric and Discomfort Management
Turmeric and its active curcuminoids are studied for anti‑inflammatory properties. In canines, evidence remains emerging, and dosing must consider safety and interactions. Turmeric may support comfort as part of a multimodal plan guided by your veterinarian.
Relative Rest and Pad Protection
Early protection, controlled activity, and timely local wound management may reduce complications and help preserve tissue for closure or secondary healing.[1] For active dogs, rapid recognition and management may shorten downtime, though return‑to‑sport timelines vary by injury severity and tissue involved.[3] Protect the pad during reintroduction of mileage and terrain.
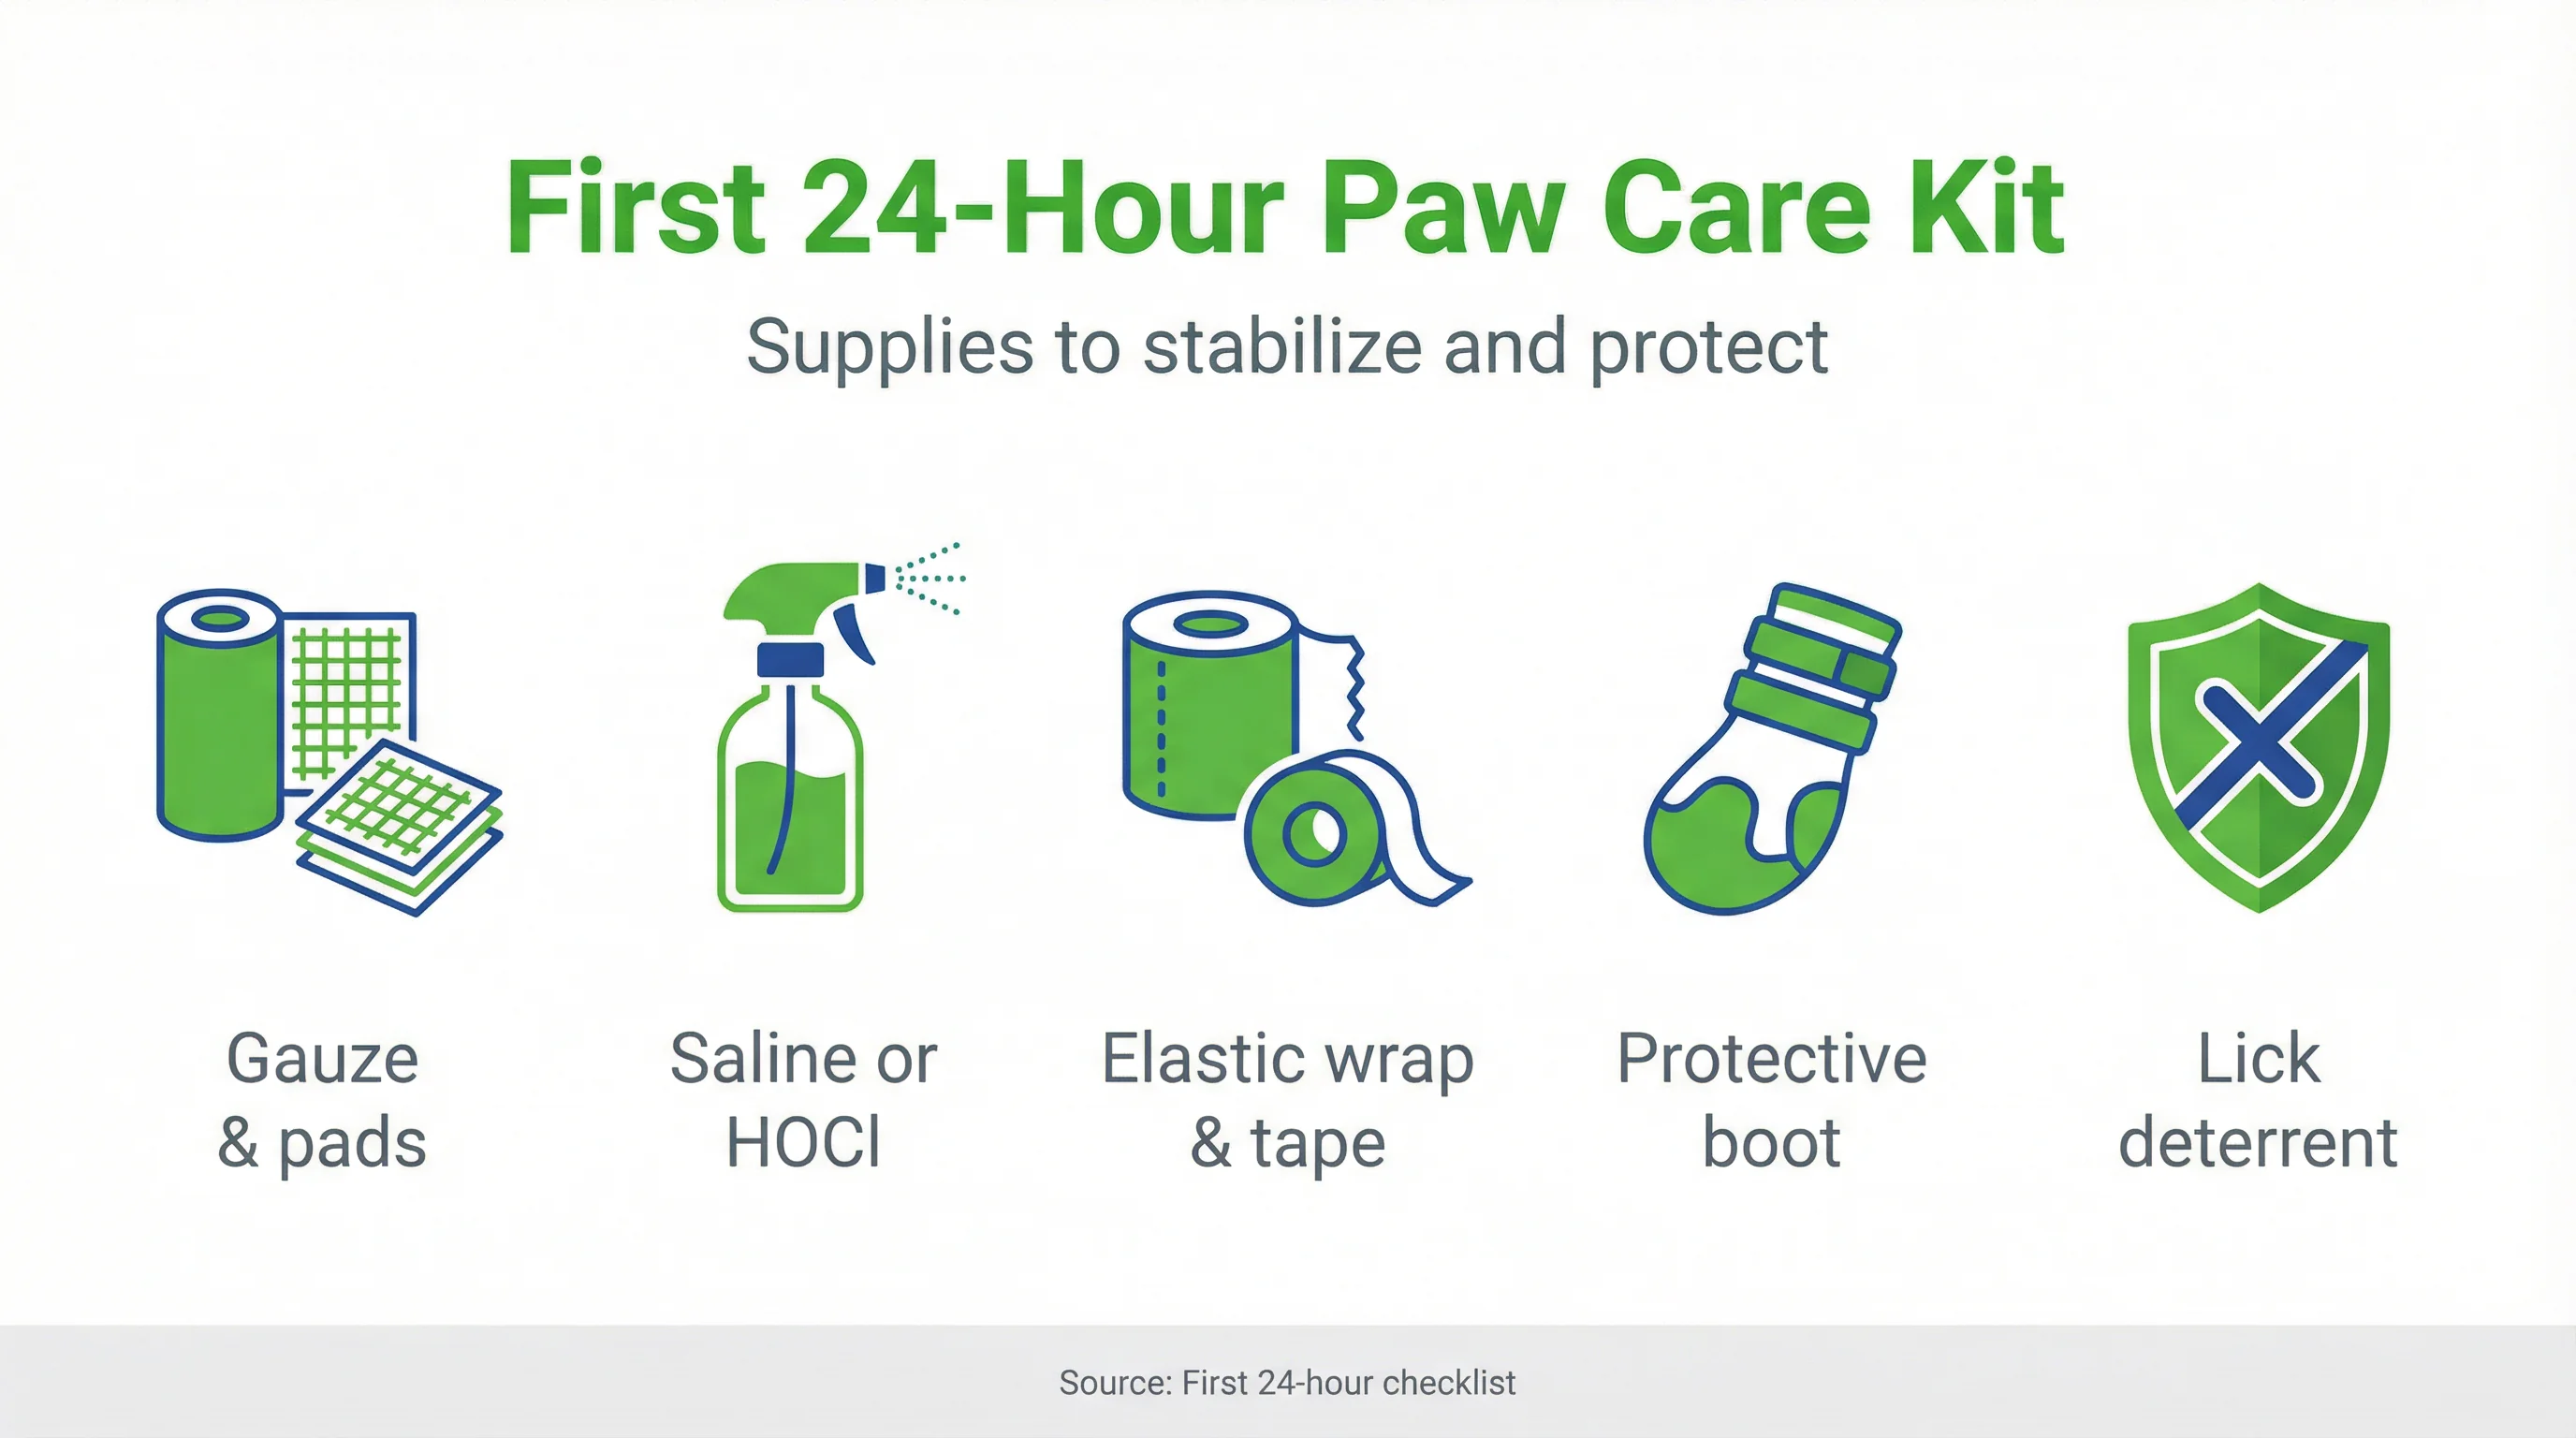
Supplies Checklist for the First 24 Hours
Essential Items and Safe Home Alternatives
- Sterile non‑stick pads and rolled gauze; clean cotton as a temporary backup.
- Hypochlorous acid wound cleanser; gentle running water if unavailable.
- Light elastic wrap for gentle compression and bandage security — see Elastic Wrap Leg Bandage.
- Protective boot for short outdoor breaks — compare options in Medical Dog Booties.
- Spare socks to cover dressings indoors; change frequently to stay dry.
- Recovery collar or soft cone to prevent licking.
- Starter kits and cleaning guidance in First‑Aid Kits and HOCl Cleanser.
- Comfort support options such as Golden Turmeric Paste for Dogs, if your veterinarian approves.
Frequently Asked Questions
How do I stop bleeding from a dog’s paw safely?
Apply firm, gentle pressure with clean gauze for 5–10 minutes without peeking. Maintain limb elevation if possible. If bleeding soaks through continuously after 10–15 minutes, contact a veterinarian promptly for guidance and care.
Can I walk my dog after a fresh paw cut?
Limit to brief, leashed potty breaks on clean, dry surfaces with a protective boot or covered bandage. Avoid running, rough terrain, and moisture until the wound seals and tenderness decreases. Increase time gradually if comfort improves.
Should I use hydrogen peroxide on paw injuries?
Peroxide may damage healthy tissue and slow healing. Evidence suggests using a gentle wound cleanser formulated for pets, such as hypochlorous acid (HOCl), may support safer cleaning. Ask your veterinarian if uncertain about products.
When does a torn paw pad need a vet?
Seek care if the tear is deep, edges are gaping, bleeding persists, there is exposed tissue or nail bed, or your dog shows severe pain, swelling, or signs of infection. Early assessment may prevent complications.
How do I keep my dog from licking the bandage?
Use a breathable medical boot or an Elizabethan/soft recovery collar. Supervise closely and change damp or soiled dressings to reduce irritation that can trigger licking. Provide rest and quiet enrichment to minimize fussing.
How This Plan Fits Into a Broader Recovery
After day one, focus on clean dressings, controlled activity, and surface choices that reduce friction. Introduce longer walks only as comfort allows. Reassess fit and dryness of boots or bandages after each outing.
When you are ready to map the next phases, including conditioning, terrain strategies, and prevention, visit our injury recovery orientation hub for structured guidance from stabilization through return to activity.
Authored by the Healers PetCare Team
References
- MM Pavletic (2018). Atlas of small animal wound management and reconstructive surgery. 2018 - books.google.com. View article
- J Aisa et al. (2022). Local wound management: A review of modern techniques and products. Veterinary dermatology. View article
- L Inkilä et al. (2022). Part II of Finnish agility dog survey: agility-related injuries and risk factors for injury in competition-level agility dogs. Animals. View article
- L Zhang et al. (2019). A systematic review and meta-analysis of clinical effectiveness and safety of hydrogel dressings in the management of skin wounds. … in bioengineering and …. View article


