
Seasonal Paw Hazards: Winter Salt, Summer Asphalt, and Trail Risks
Seasonal Paw Hazards: Winter Salt, Summer Asphalt, and Trail Risks
Seasonal paw hazards often strike before we notice them. A proactive routine prevents small irritations from becoming painful injuries. Many risks are predictable with the right checks.
This guide shows how to test surfaces quickly and set safety boundaries. You will learn region-specific logic, a rapid decision guide, and simple protection habits. Apply them to keep paws conditioned through winter, summer, and trail seasons.
Scenario: One dog, four seasons—how to prevent paw damage before it starts
Region‑specific risk map: cold, heat, and trail variables to watch
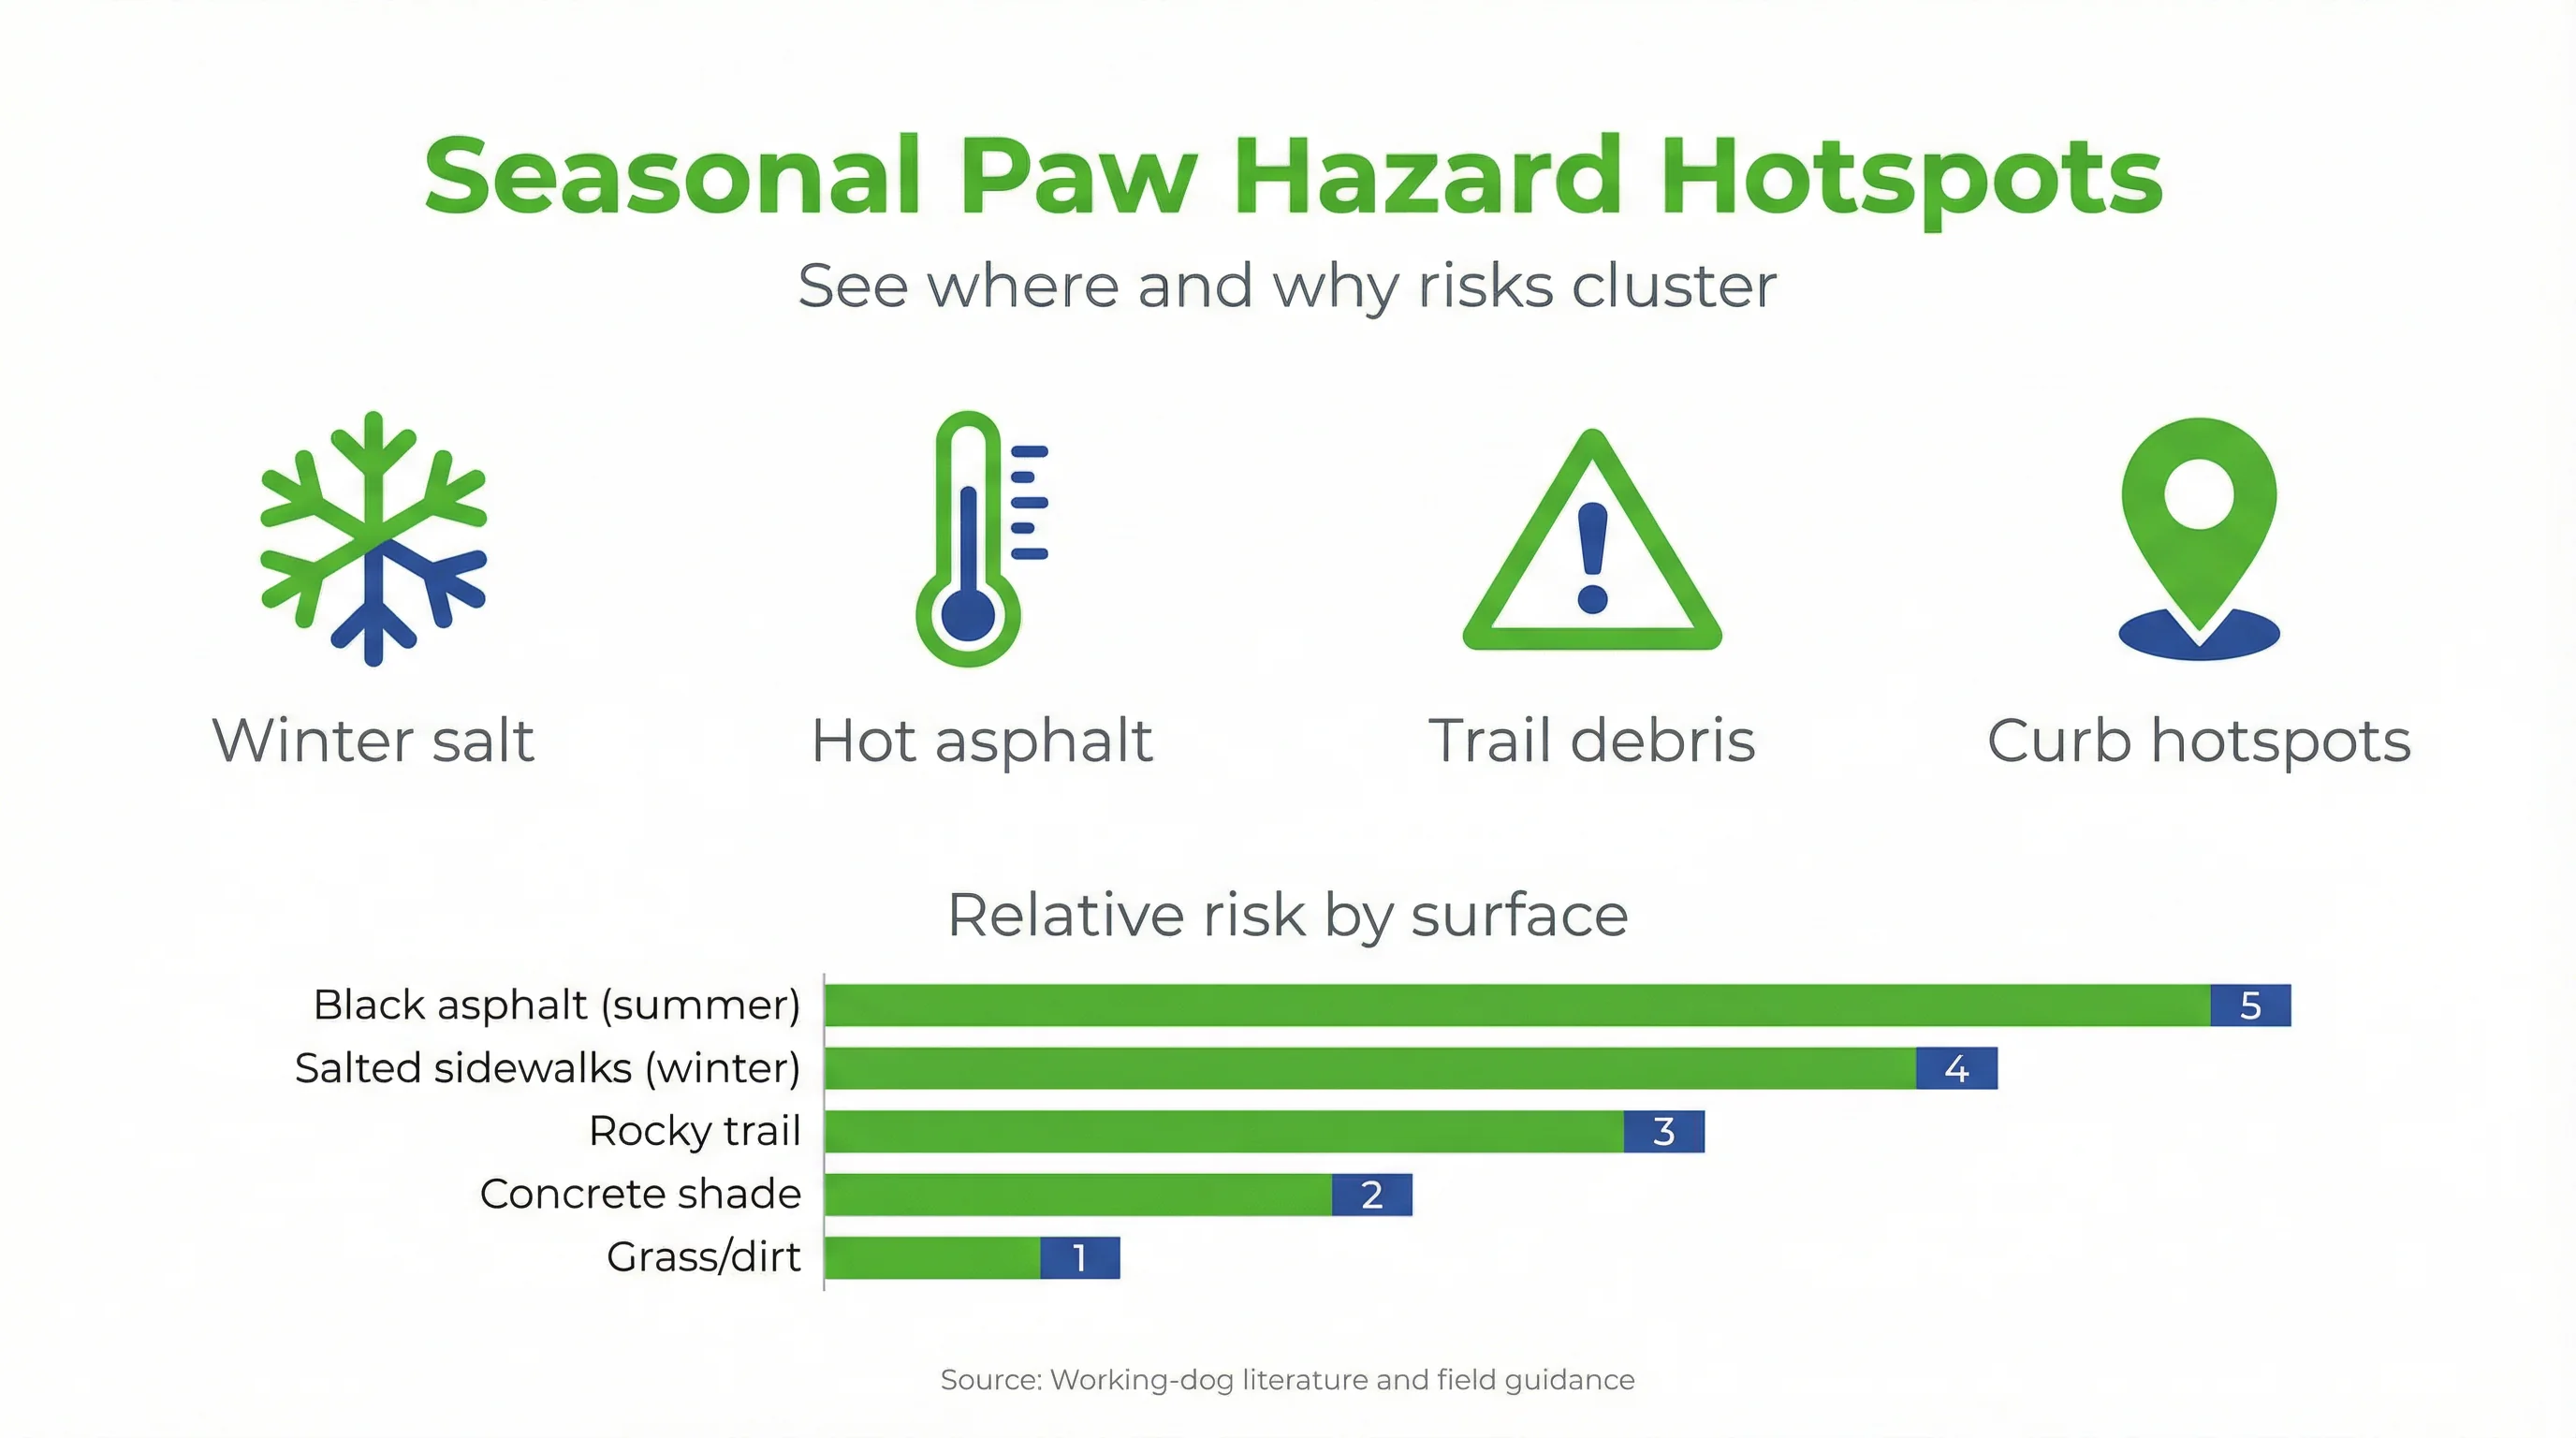
Cold regions face winter salt on sidewalks, freeze–thaw ice ridges, and slush that hides debris. Warm regions bring hot asphalt dog paws risks, sun-exposed concrete, and reflective heat near buildings. Mountain or desert trails add sharp rock, cactus spines, and sudden temperature shifts at elevation. Coastal climates introduce sand abrasion and saltwater drying. Use weather apps plus route notes to anticipate surface temperatures and moisture. Adjust mileage, pace, and surfaces as conditions shift day-to-day.
Daily route audit: where micro‑hazards hide on sidewalks and trails
Micro-hazards cluster at curb lines, driveway seams, storm grates, and construction zones. In winter, salt granules concentrate at intersections and entryways. In summer, blacktop patches, dark pavers, and metal plates heat unevenly. On trails, roots, shale, and thorny brush line edges and shortcuts. Scan 10–20 feet ahead, and re-route to painted asphalt, grass margins, decomposed granite, or shaded concrete. Small detours deliver big gains in dog paw protection.
Quick decision guide (if X, then Y)
Fast triage for winter salt, hot asphalt, and rugged terrain
- If the back-of-hand test stings before five seconds, choose grass, shade, or cooled concrete. Shorten sessions and carry water for paw wetting.
- If sidewalks show white salt residue, switch to plowed grass strips or snowpack. Rinse paws immediately after returning home.
- If the trail is rocky or full of thorns, slow to a hike pace. Add boot protection and inspect every 45–60 minutes.
- If pads look abraded or softened, pause running for 48–72 hours. Use breathable protection and consult first-aid guidance.
- If rain creates slick asphalt, select textured paths. Reduce turning and sprinting to lower shear forces.
- If midday temps surge, move walks to early morning or after sunset. Prioritize tree-lined routes and light-colored paths.
- If construction debris appears, cross the street and avoid fresh sealcoat. Check pads for tar or grit immediately.
Research on operational canines underscores that soft tissue and pad injuries are common with heat, chemicals, and rugged terrain. Routine triage and route adjustments help reduce risk[3].
Testing tips you can do in seconds
Back‑of‑hand asphalt test and surface checks
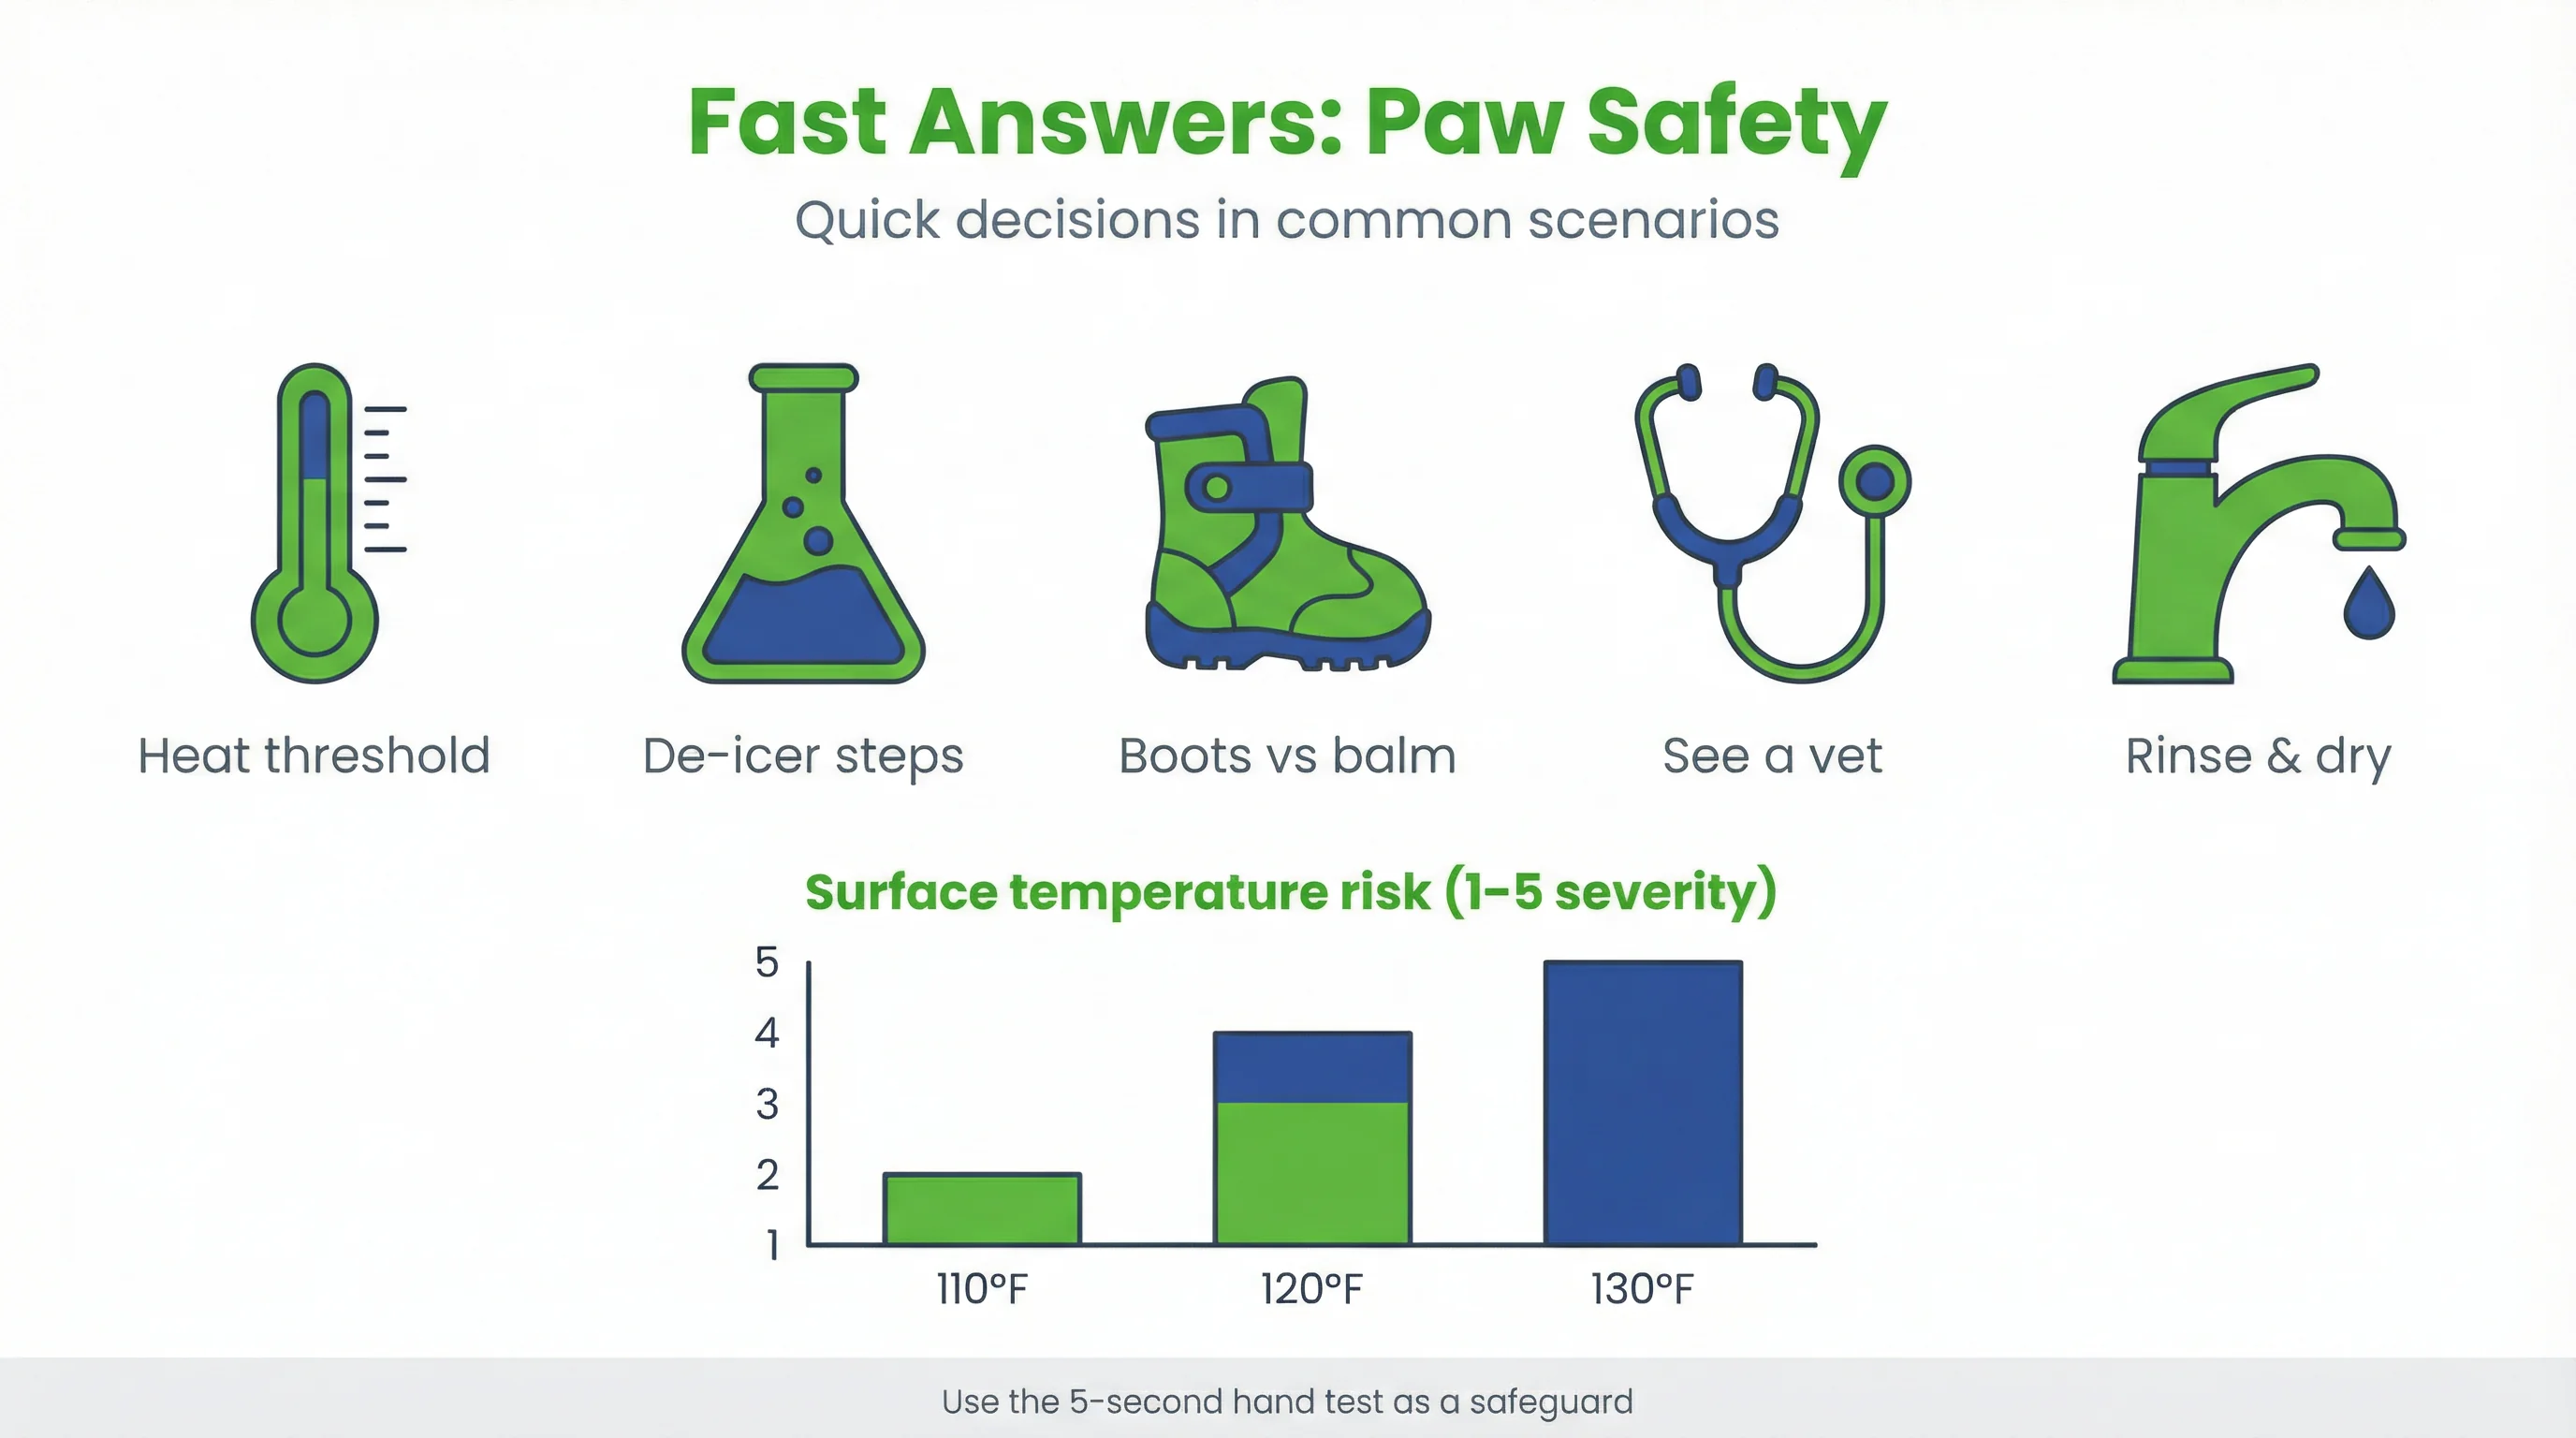
Place the back of your hand on the walking surface for five seconds. If you must pull away, it is too hot for safe contact. Test multiple spots, including dark patches and sunlit zones. Tap metal covers, which heat faster than concrete. After rain or melting snow, feel for slickness and grit. Repeat mid-walk, because surface temperatures climb rapidly with sun angle.
Salt, de‑icer, and grit checks at curb lines and entryways
Look for crystalline residue, wet film, or colored pellets near storefronts, stairs, and bus stops. Step aside and brush the area with your shoe to detect sharp granules. Choose snowpack or treated grass when possible. After walks through winter salt dog paws zones, rinse with lukewarm water and pat dry. Evidence indicates chemical irritants can aggravate skin and pads; prompt rinsing may reduce contact time[1].
Protection strategies by season
Winter: salt management and moisture barriers
Plan routes on plowed, less-treated sidewalks, or hard-packed snow. Apply a thin paw balm before walks to limit moisture loss, then rinse and dry after. Rotate short outings to prevent prolonged exposure. For recovery phases, breathable coverings or medical dog booties may support healing while avoiding adhesive contact. Many pet owners also find Urban Walkers III helpful for multi-season protection without compromising traction.
Summer: heat avoidance windows and surface swaps
Walk before 10 a.m. or after sunset during heat waves. Prefer shaded concrete, grass, and dirt over blacktop. Use the hand test at every route change. Schedule conditioning gradually, adding five-minute increments weekly. Carry water to wet paws and rest in shade. Hot asphalt dog paws are vulnerable after swimming, when softened pads are less resilient. Delay running accelerations until surfaces cool.
Trails: abrasion, thorns, and microbial exposure
Choose stable footing and avoid scree fields or thorny shoulders. Trim excess hair between toes to reduce debris capture. Pause regularly to clear grit and seeds. Pack a rinse bottle and gauze for quick cleans. Trail hazards for dogs include sharp shale, foxtails, and mud-borne microbes. After hikes, wash with mild cleanser, dry thoroughly, and check for hidden abrasions between pads.
For quick-access supplies on the move, see how to build a compact kit in our first-aid kit for home, car, and trail resource.
Monitoring guidance: what to track at 7–14 days and 4–8 weeks
Short‑term signs that suggest improvement or concern
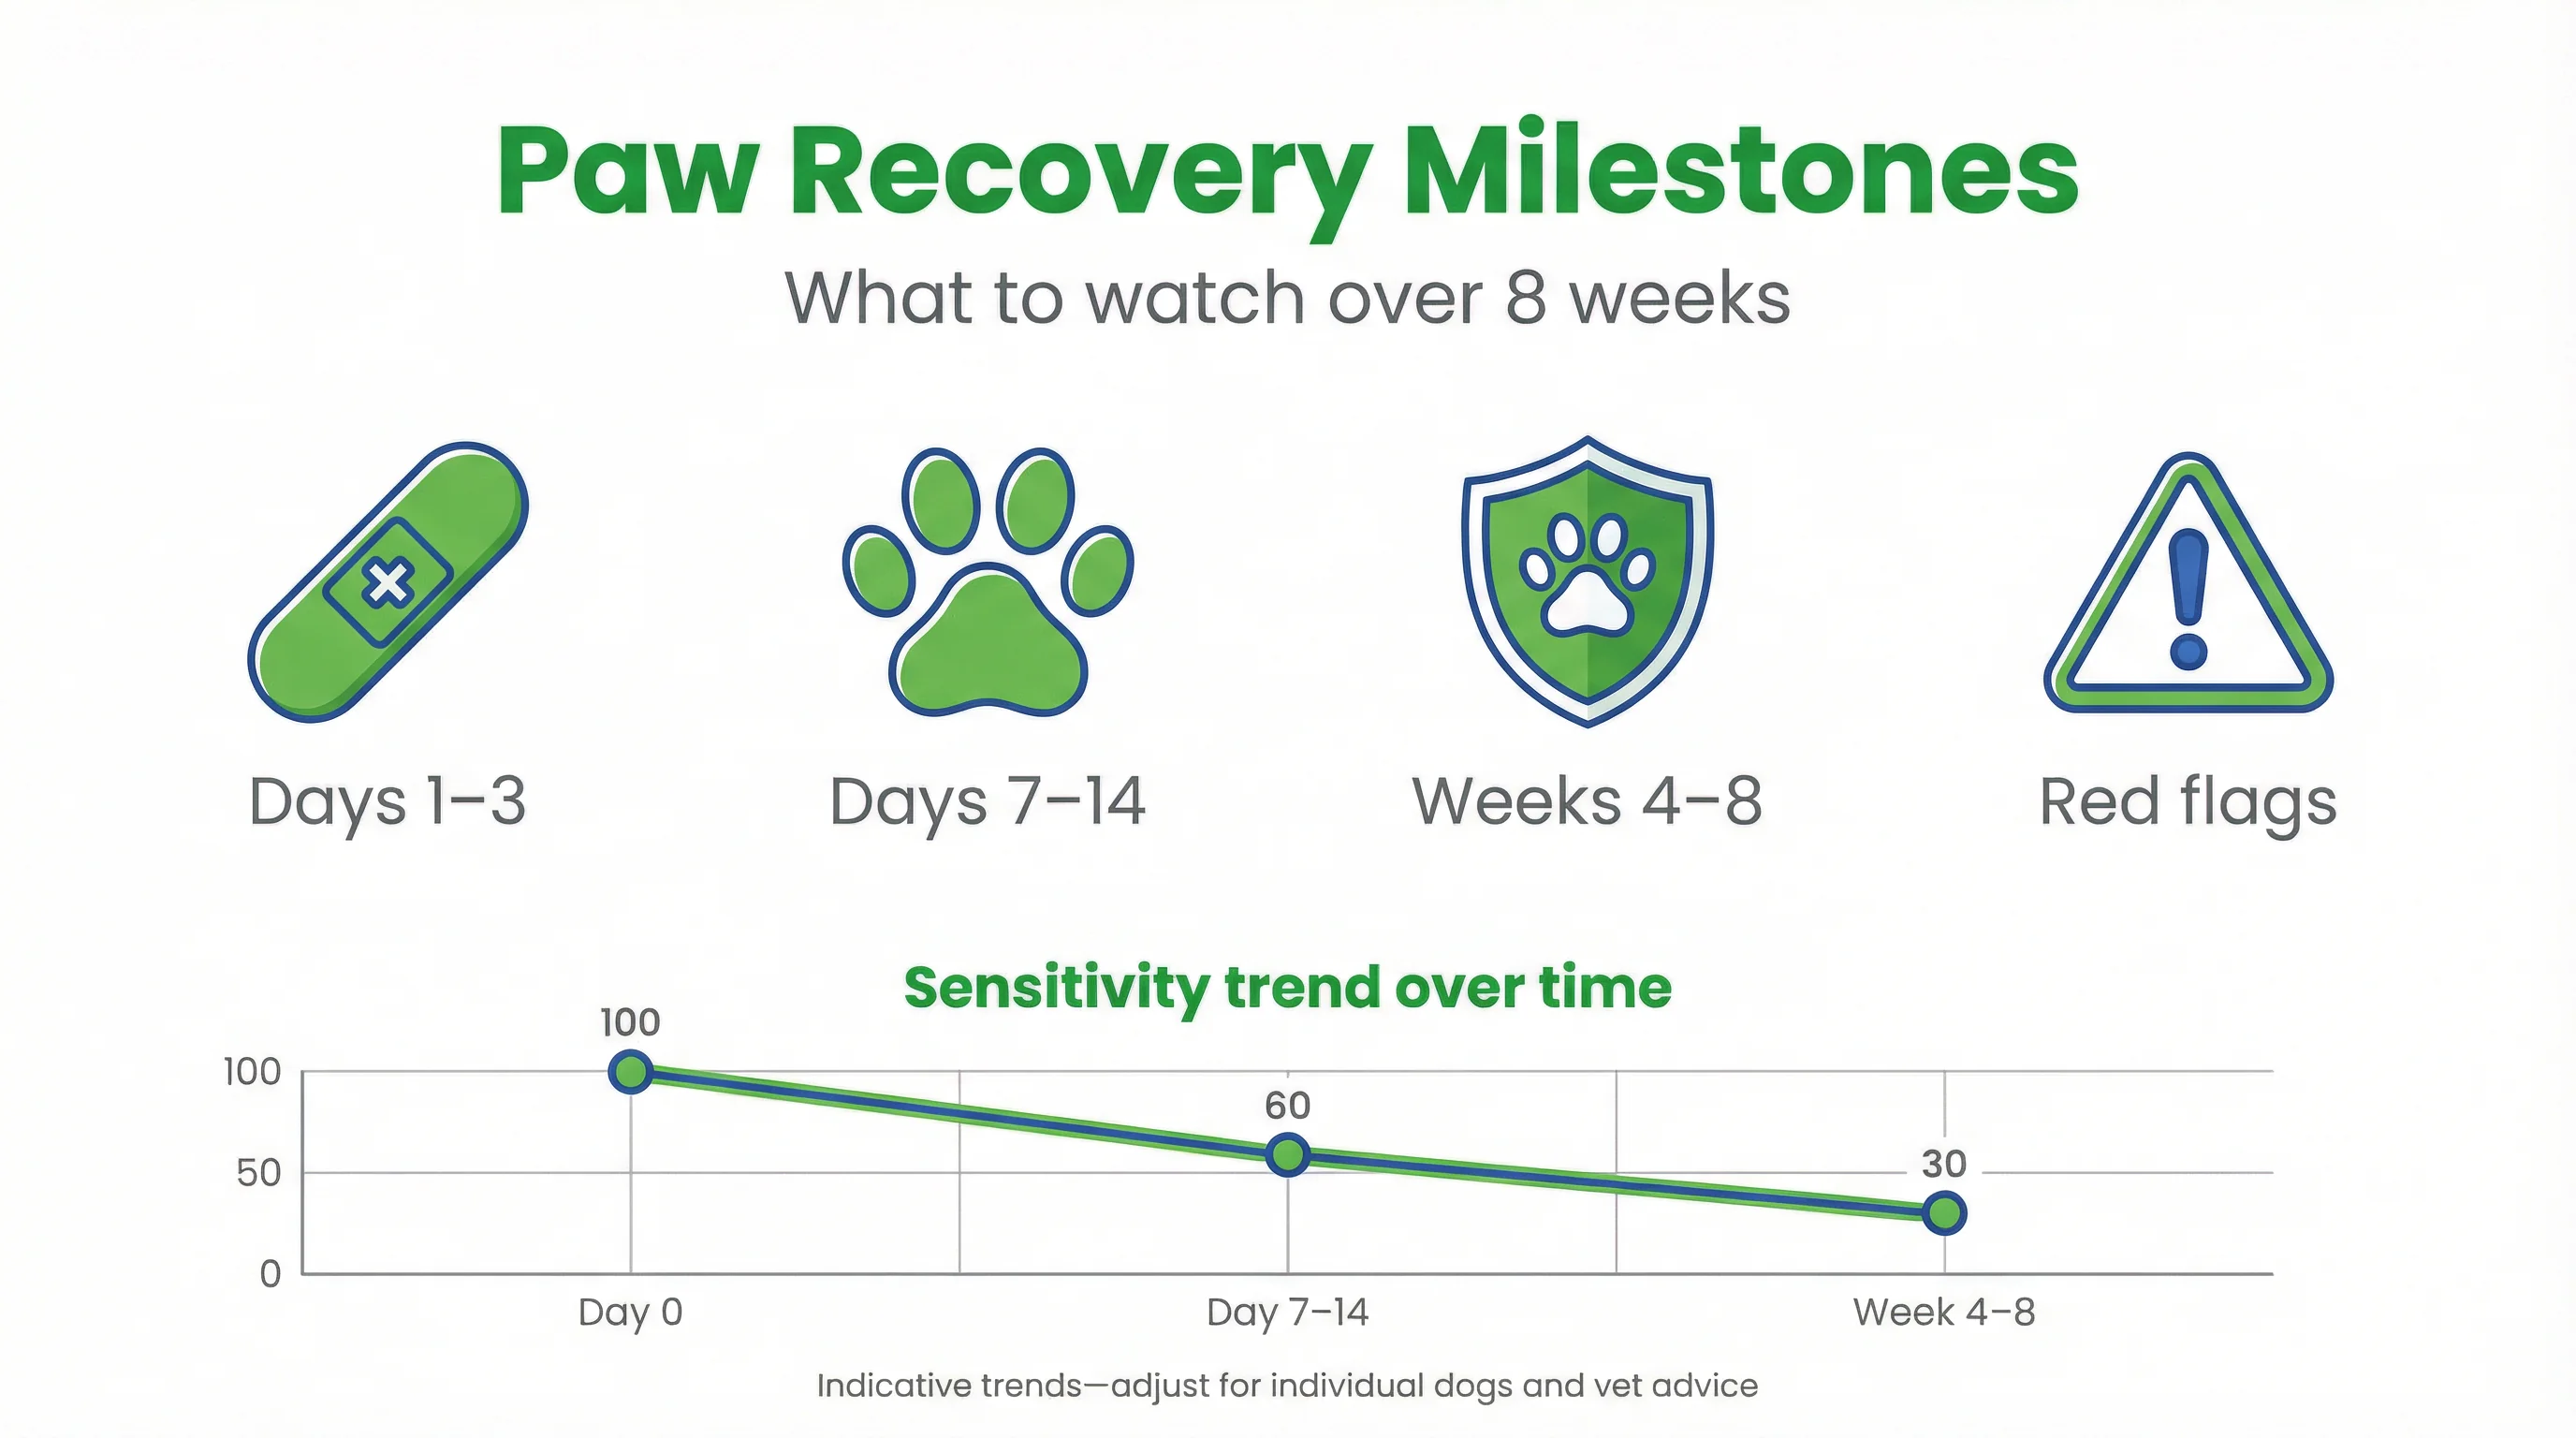
Over the first 7–14 days, look for reduced licking, normalized gait, and fewer flinches on warm or salted surfaces. Mild dryness should ease with routine care. Concerning signs include persistent redness, split pads, limping, or hot spots between toes. If symptoms persist, pause activity and consult a clinician. Regular clinical evaluation helps identify risk factors early and prevents escalation[2].
Longer‑term durability and conditioning benchmarks
Within 4–8 weeks, well-managed paws often show thicker, more resilient pad tissue and decreased sensitivity on varied surfaces. Weekly mileage can rise conservatively by 10–15 percent if comfort remains stable. Watch for delayed-onset soreness after harder sessions. If abrasion recurs, reduce volume and return to easier surfaces. A structured, gradual plan aligns with professional guidance for working and sporting dogs[3].
Practical safety boundaries
Time, temperature, and terrain limits that reduce risk
Set heat cutoffs using the hand test and air temperature. During hot spells, limit continuous asphalt time to 5–10 minutes, then switch to grass. In winter, avoid slush-salt mix beyond 15–20 minutes without a rinse plan. On rocky trails, cap first outings at 60–75 minutes. Increase only if pads remain smooth and pain-free the following day. These boundaries keep stress predictable and manageable.
When to pause activity and reassess
Pause immediately if you see bleeding, a sudden limp, or repeated paw lifting. End the session if pads feel mushy after water exposure or if salt is visible and widespread. Treat abrasions promptly and review fit if you used coverings. If you suspect a wound, stabilize and follow early-care steps in our first 24 hours after a paw injury guide.
Evidence status: what research and expert guidance suggest
Heat transfer and pad injury thresholds
Working-dog literature highlights that paw pad injury risk rises with surface heat, rapid acceleration, and prolonged exposure. Heat conduction from dark surfaces can exceed safe tissue limits faster than expected, especially at midday[3]. Applying quick field tests and timing adjustments may reduce the likelihood of burns.
De‑icer irritation and rinse‑off benefits
Chemical de-icers are recognized risk factors for paw irritation and interdigital dermatitis. Evidence suggests that simple rinse-and-dry routines after exposure may lower contact time and reduce irritation intensity when performed consistently[1], [2]. Selection of less irritating agents in community settings also helps.
Boot and bandage use during recovery
Expert guidance for operational canines notes that well-fitted boots and appropriate bandaging can protect compromised tissue during activity when monitored carefully[3]. Survey data in running sports further indicate fewer reported paw injuries while dogs wore protective gear, though fit and usage patterns vary by team[4]. Comfort checks and moisture management remain essential.
How this supports injury recovery plans
Reducing setbacks and protecting healing tissue
Season-aware routines limit friction, heat, and chemical exposure that can delay healing. During recovery, substitute abrasive or hot surfaces with cooler, predictable footing, and shorten sessions. Use breathable coverings judiciously and confirm comfort every stop. For broader planning, connect these practices with our dog recovery and prevention guide to align routes, rest days, and first-aid essentials.
Frequently Asked Questions
How hot is too hot for dogs to walk on asphalt?
Evidence suggests pad injury risk rises when surface temps exceed roughly 120–125°F. If the back‑of‑hand test is uncomfortable after 5 seconds, choose cooler surfaces or walk earlier/later.
What should I do if my dog licks winter salt from their paws?
Rinse paws with lukewarm water and gently dry. Monitor for vomiting or diarrhea and contact a veterinarian if symptoms appear or if your dog may have ingested larger amounts.
Do dog booties help prevent paw injuries on trails?
Booties may reduce abrasion, thorn punctures, and exposure to contaminants. Fit and breathability matter; monitor for rubbing and remove to dry if wet.
Is the back‑of‑hand test reliable for asphalt safety?
It offers a quick, practical check but is not a precise measurement. Use it alongside time‑of‑day planning, shade routes, and shorter sessions during heat.
How often should I check my dog’s paws during a hike?
Inspect every 45–60 minutes and after rough segments. Look for small cuts, embedded debris, heat buildup, and pad thinning, then clean and cover as needed.
Seasonal paw hazards are manageable with timely tests, route choices, and thoughtful protection. Use the back-of-hand check, rinse after salt exposure, and schedule conditioning in measured steps. These habits support comfort today and resilience for the next season. Adjust early, monitor regularly, and keep your kit ready so paws stay strong on every surface.
References
- I Wiberg (2024). The Influence of Risk Factors on the Health of Dogs' Paws and the Importance of Clinical Evaluation of the Paw in Clinical Practice. 2024 - search.proquest.com. View article
- I Wiberg (2026). The influence of risk factors on the health of dogs' paws and the importance of clinical evaluation of the paw in clinical practice Rizikos veiksnių įtaka šunų …. lsmu.lt. View article
- L Palmer (2021). Operational canine. Veterinary Clinics: Small Animal Practice. View article
- P Lafuente et al. (2018). A retrospective survey of injuries occurring in dogs and handlers participating in canicross. Veterinary and comparative orthopaedics …. View article


