Paw Pad First Aid: HOCl Wound Care, Bandaging, and Booting Protocol
Paw Pad First Aid: HOCl Wound Care, Bandaging, and Booting Protocol
Scraped, split, or burned paw pads demand calm, methodical care. When treated correctly from the start, most superficial pad wounds recover cleanly and avoid infection or re-injury. This focused protocol walks you through the essential workflow: rapid assessment, HOCl cleansing, meticulous drying, smart gauze layering, elastic wrapping, and protective boot application—plus red flags that require a veterinarian.
If you have already reviewed a general overview of paw pad first aid, use this article as your practical, step-by-step guide. Keep your supplies organized, move deliberately, and prioritize comfort, cleanliness, and circulation at every stage.
Know the Risks: Common Paw Pad Injuries and When to Worry
Paw pads are durable yet vulnerable on abrasive, hot, icy, or contaminated terrain. Understanding typical hazards and red flags helps you act promptly and appropriately during canine wound care.
Typical hazards (heat, ice melt, glass, trail abrasion)
Hot pavement, ice melt chemicals, broken glass, and rough trail grit are leading causes of pad abrasions, burns, and lacerations. Urban sidewalks and seasonal extremes increase exposure risk, especially for active dogs and those with sensitive skin[3]. For prevention strategies and surface-smart planning, see our outdoor paw protection master guide.
Red flags that require a veterinarian visit
Some injuries exceed home care. Seek veterinary help for:
- Deep lacerations, persistent bleeding, exposed tissue, or embedded objects
- Severe burns, rapidly worsening limping, or inability to bear weight
- Foul odor, fever, or signs of systemic illness
- Pain that prevents calm handling or safe bandaging
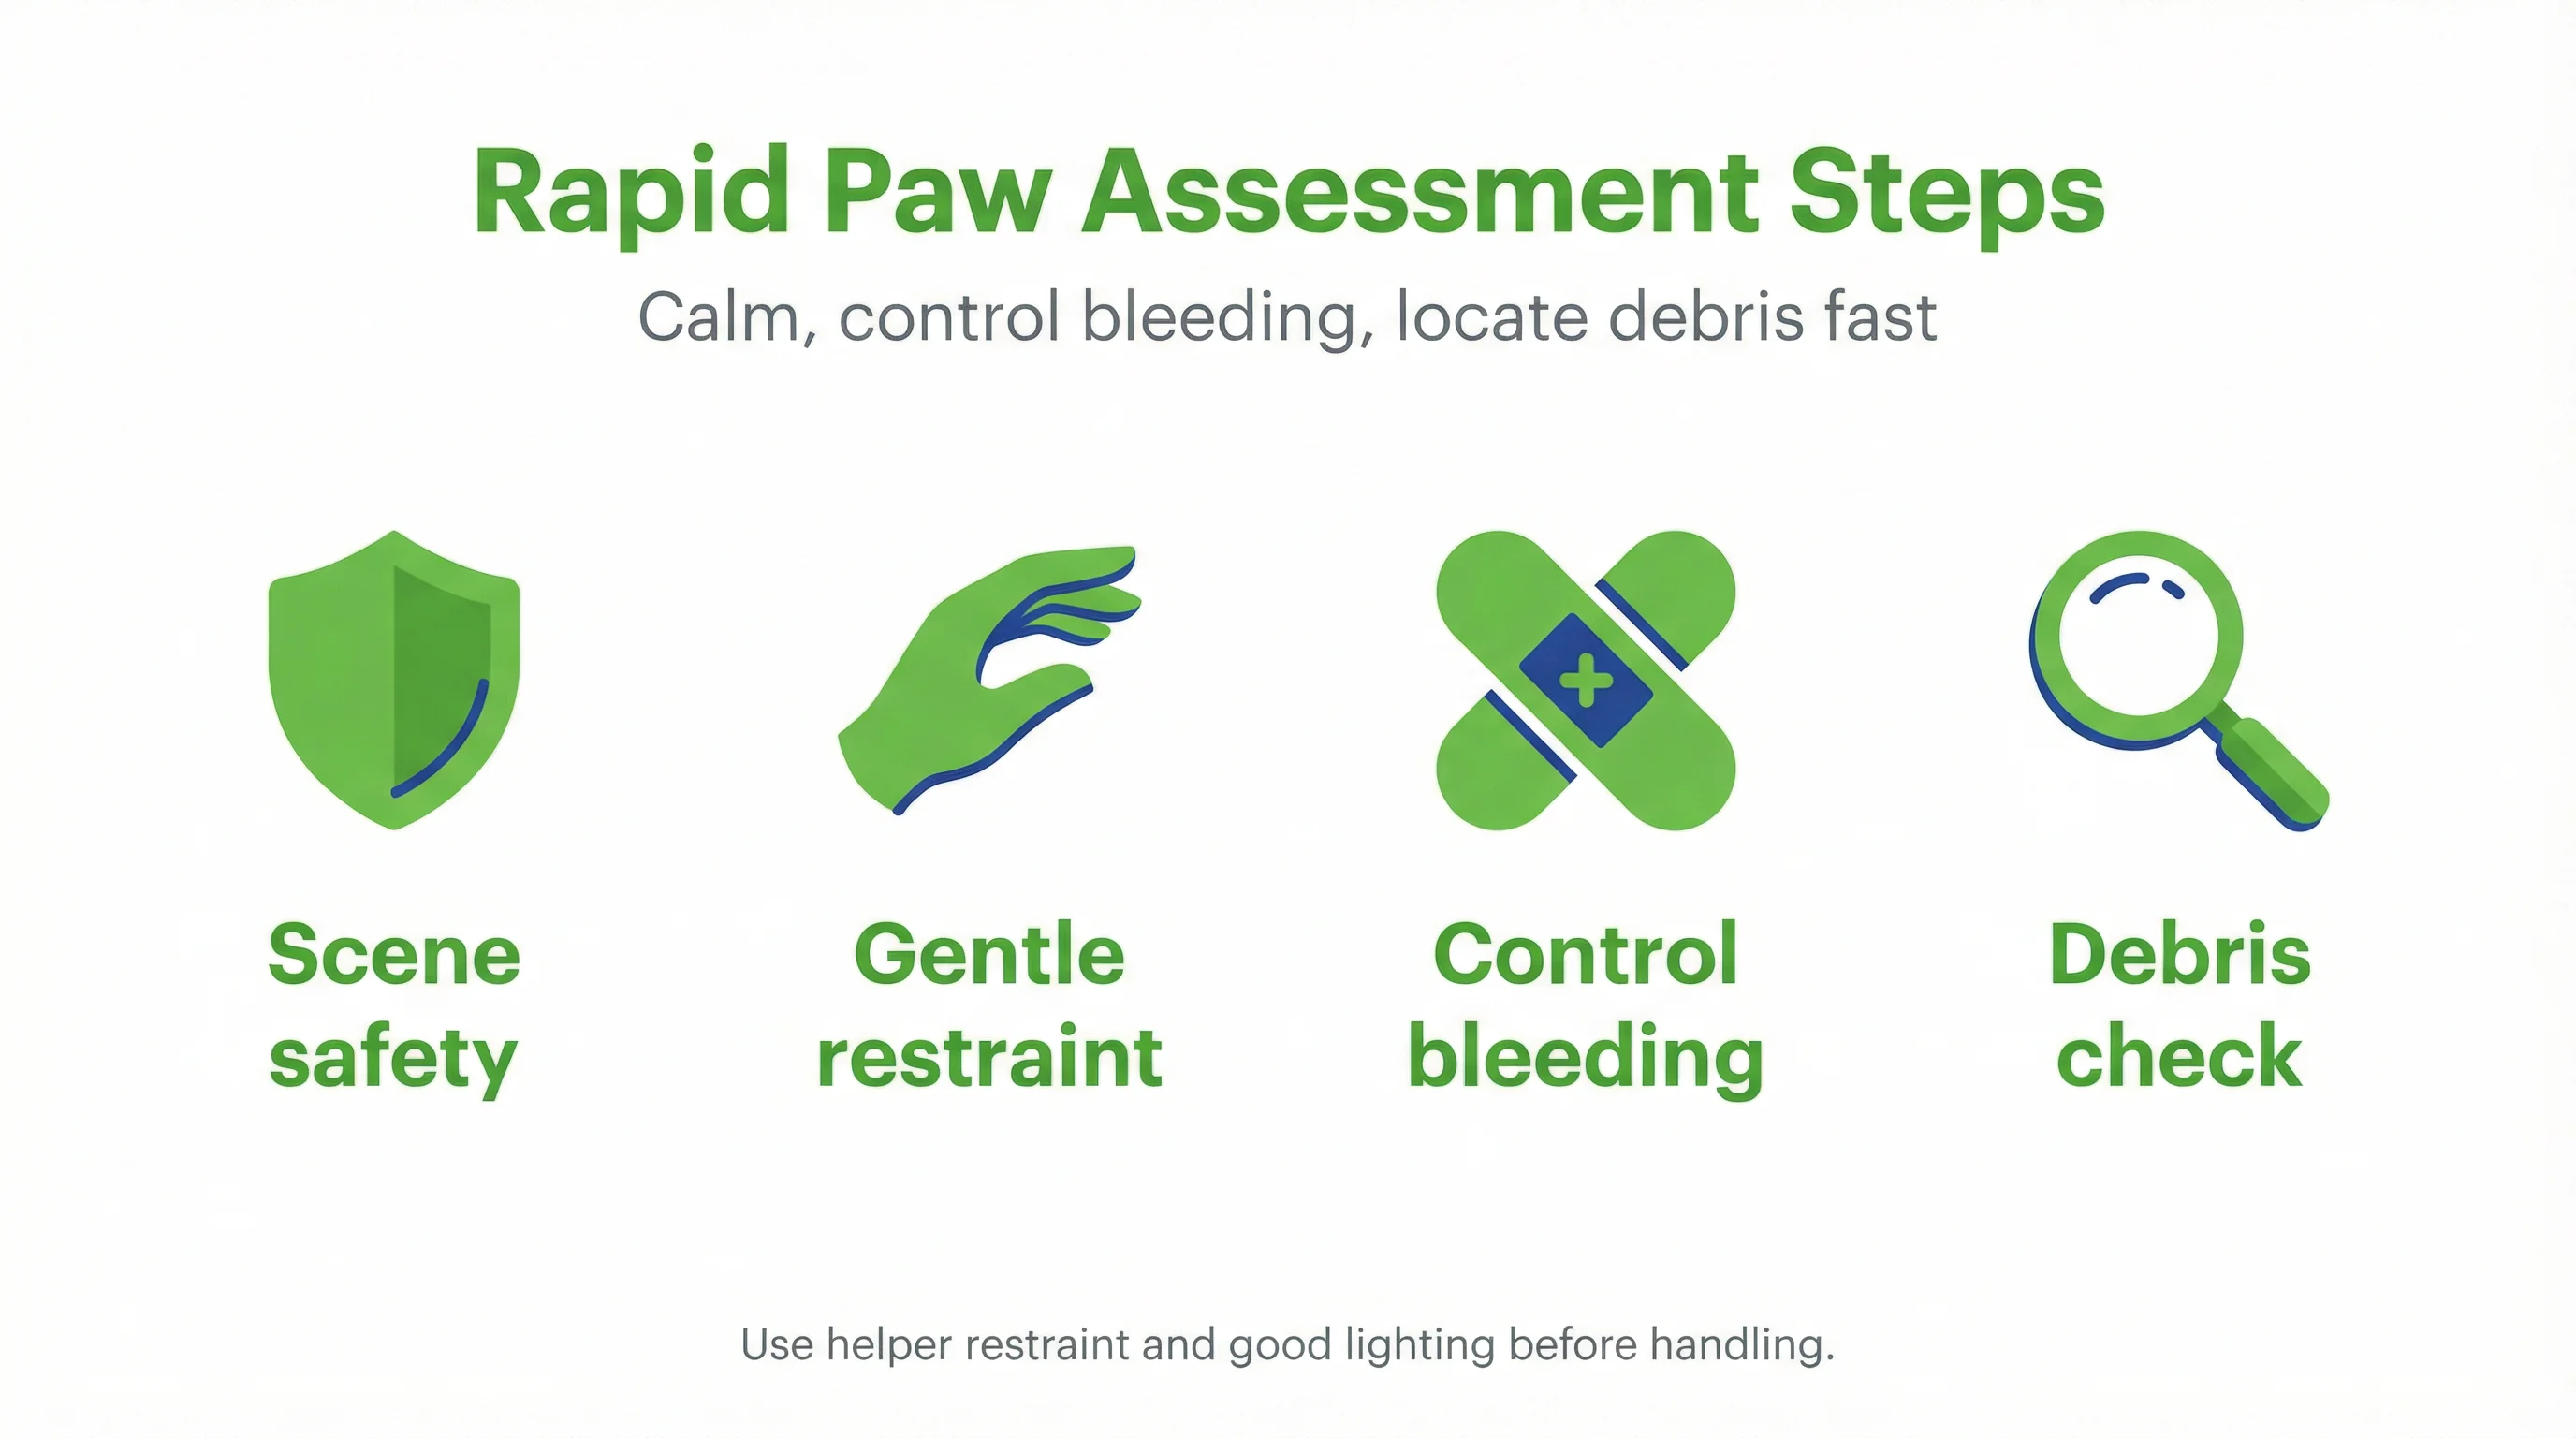
Rapid Assessment: Safety, Bleeding Control, and Debris Check
Before touching the wound, create a safe, well-lit space and control movement. Then stop active bleeding and identify contaminants that must be removed.
Safe restraint and inspection setup
Position the dog on a stable surface with good lighting. Use a calm helper for gentle restraint, supporting the hip and shoulder. A soft towel or cone prevents licking. Keep your supplies ready—gloves, gauze, HOCl wound care for dogs spray, and elastic wrap—so you minimize handling time.
Controlling bleeding and identifying contamination
- Apply firm, steady pressure with clean gauze for 3–5 minutes; elevate the paw if possible.
- Reassess. If bleeding persists, continue pressure and consider a temporary pressure bandage.
- Visually inspect for grit, glass, thorns, or salt crystals. Do not dig into wounds.
- If large debris is embedded, stop and contact a veterinarian.
HOCl Wound Care: Evidence‑Informed Cleansing Steps
Hypochlorous acid (HOCl) is a proven tool for cleansing canine wounds. When used correctly, it reduces microbial load while being gentle on healing tissues.
Why hypochlorous acid (HOCl) for canine wounds
Veterinary literature supports HOCl as a non-stinging, tissue-friendly cleanser with broad antimicrobial benefits in wound protocols[2]. Paws are frequent wound sites and can be clinically challenging because of contamination and motion, making effective yet non-cytotoxic cleansing crucial[4].
How to cleanse a paw pad with HOCl properly
- Glove up. Gently flush the area with HOCl to dislodge dirt and reduce bioburden.
- Use sterile gauze to wipe outward from the wound, changing pads often.
- Repeat a gentle flush until the solution runs clear.
- Do not mix HOCl with soaps or ointments during the same step; apply topicals later only if directed.
Drying and Dressing: Gauze Layering That Protects and Breathes
Moisture balance is the goal—dry enough to prevent maceration but not so dry that new tissue desiccates. Thoughtful layering supports comfort and protection.
Pat‑dry technique and moisture management
After cleansing, lightly pat-dry with sterile gauze. Avoid rubbing, which lifts fragile tissue. If the wound is weepy, use a non-adherent contact layer that manages exudate without sticking. Keeping the interdigital spaces dry helps prevent skin breakdown and infection spread.
Primary vs. secondary dressings for paw pads
Choose dressings based on exudate and protection needs. The table below summarizes common options:
| Layer | Material | Purpose |
|---|---|---|
| Primary (contact) | Non-adherent pad (e.g., Telfa) | Protects wound surface; minimizes sticking |
| Primary (moisture) | Hydrogel or impregnated gauze | Maintains moisture for shallow abrasions |
| Secondary (absorbent) | Gauze roll or folded pads | Absorbs drainage; adds cushioning |
| Outer support | Elastic cohesive wrap | Secures layers; provides light compression |
Modern dressing choices and change intervals are core elements of best-practice veterinary wound care[2].

Elastic Wrapping: Secure Without Strangling Circulation
An effective wrap stabilizes dressings and adds mild compression while preserving blood flow and toe mobility. Precision matters.
Bandage tension, overlap, and anchor points
- Start with an anchor around the metacarpal/metatarsal region, avoiding excessive tension.
- Spiral distally, then proximally with 50% overlap; keep the layer smooth.
- Leave toenail tips visible for circulation checks.
- Finish with a light proximal anchor; ensure fur is not trapped.
Maintain uniform tension to avoid pressure points and slippage during dog paw bandaging[2].
Circulation checks and re‑wrap frequency
Every 1–2 hours initially, assess toe warmth, color, and swelling. If toes are cool, pale, or puffy, remove and re-wrap. Reassess the bandage at least daily, with changes guided by drainage and comfort[2].
Takeaway: Snug secures healing; tight jeopardizes circulation. Always verify toe perfusion.
Protective Booting: Indoor and Outdoor Protocols
Boots shield the bandage from moisture, dirt, and mechanical stress. Match fit and traction to the surface and time outside to prevent overheating or slippage.
Fitting medical dog booties over bandages
Choose a boot with adjustable closures and a stable sole. Fit over the wrapped paw, ensuring no twist points. For guidance on selection, see medical dog booties and fitting tips in How to Measure, Fit, and Break In Dog Boots. Supportive protection is recommended for split or fragile pads to reduce physical stress during healing[1]. Many pet owners find Pet Injury Duo Pack helpful for this task.
Outdoor precautions, traction, and time limits
For outdoor use, pair paw protection boots with short, leashed outings on smooth surfaces. Avoid heat, ice, and sharp gravel. Check for moisture buildup every 15–20 minutes and remove boots indoors to let the bandage breathe and stay dry.
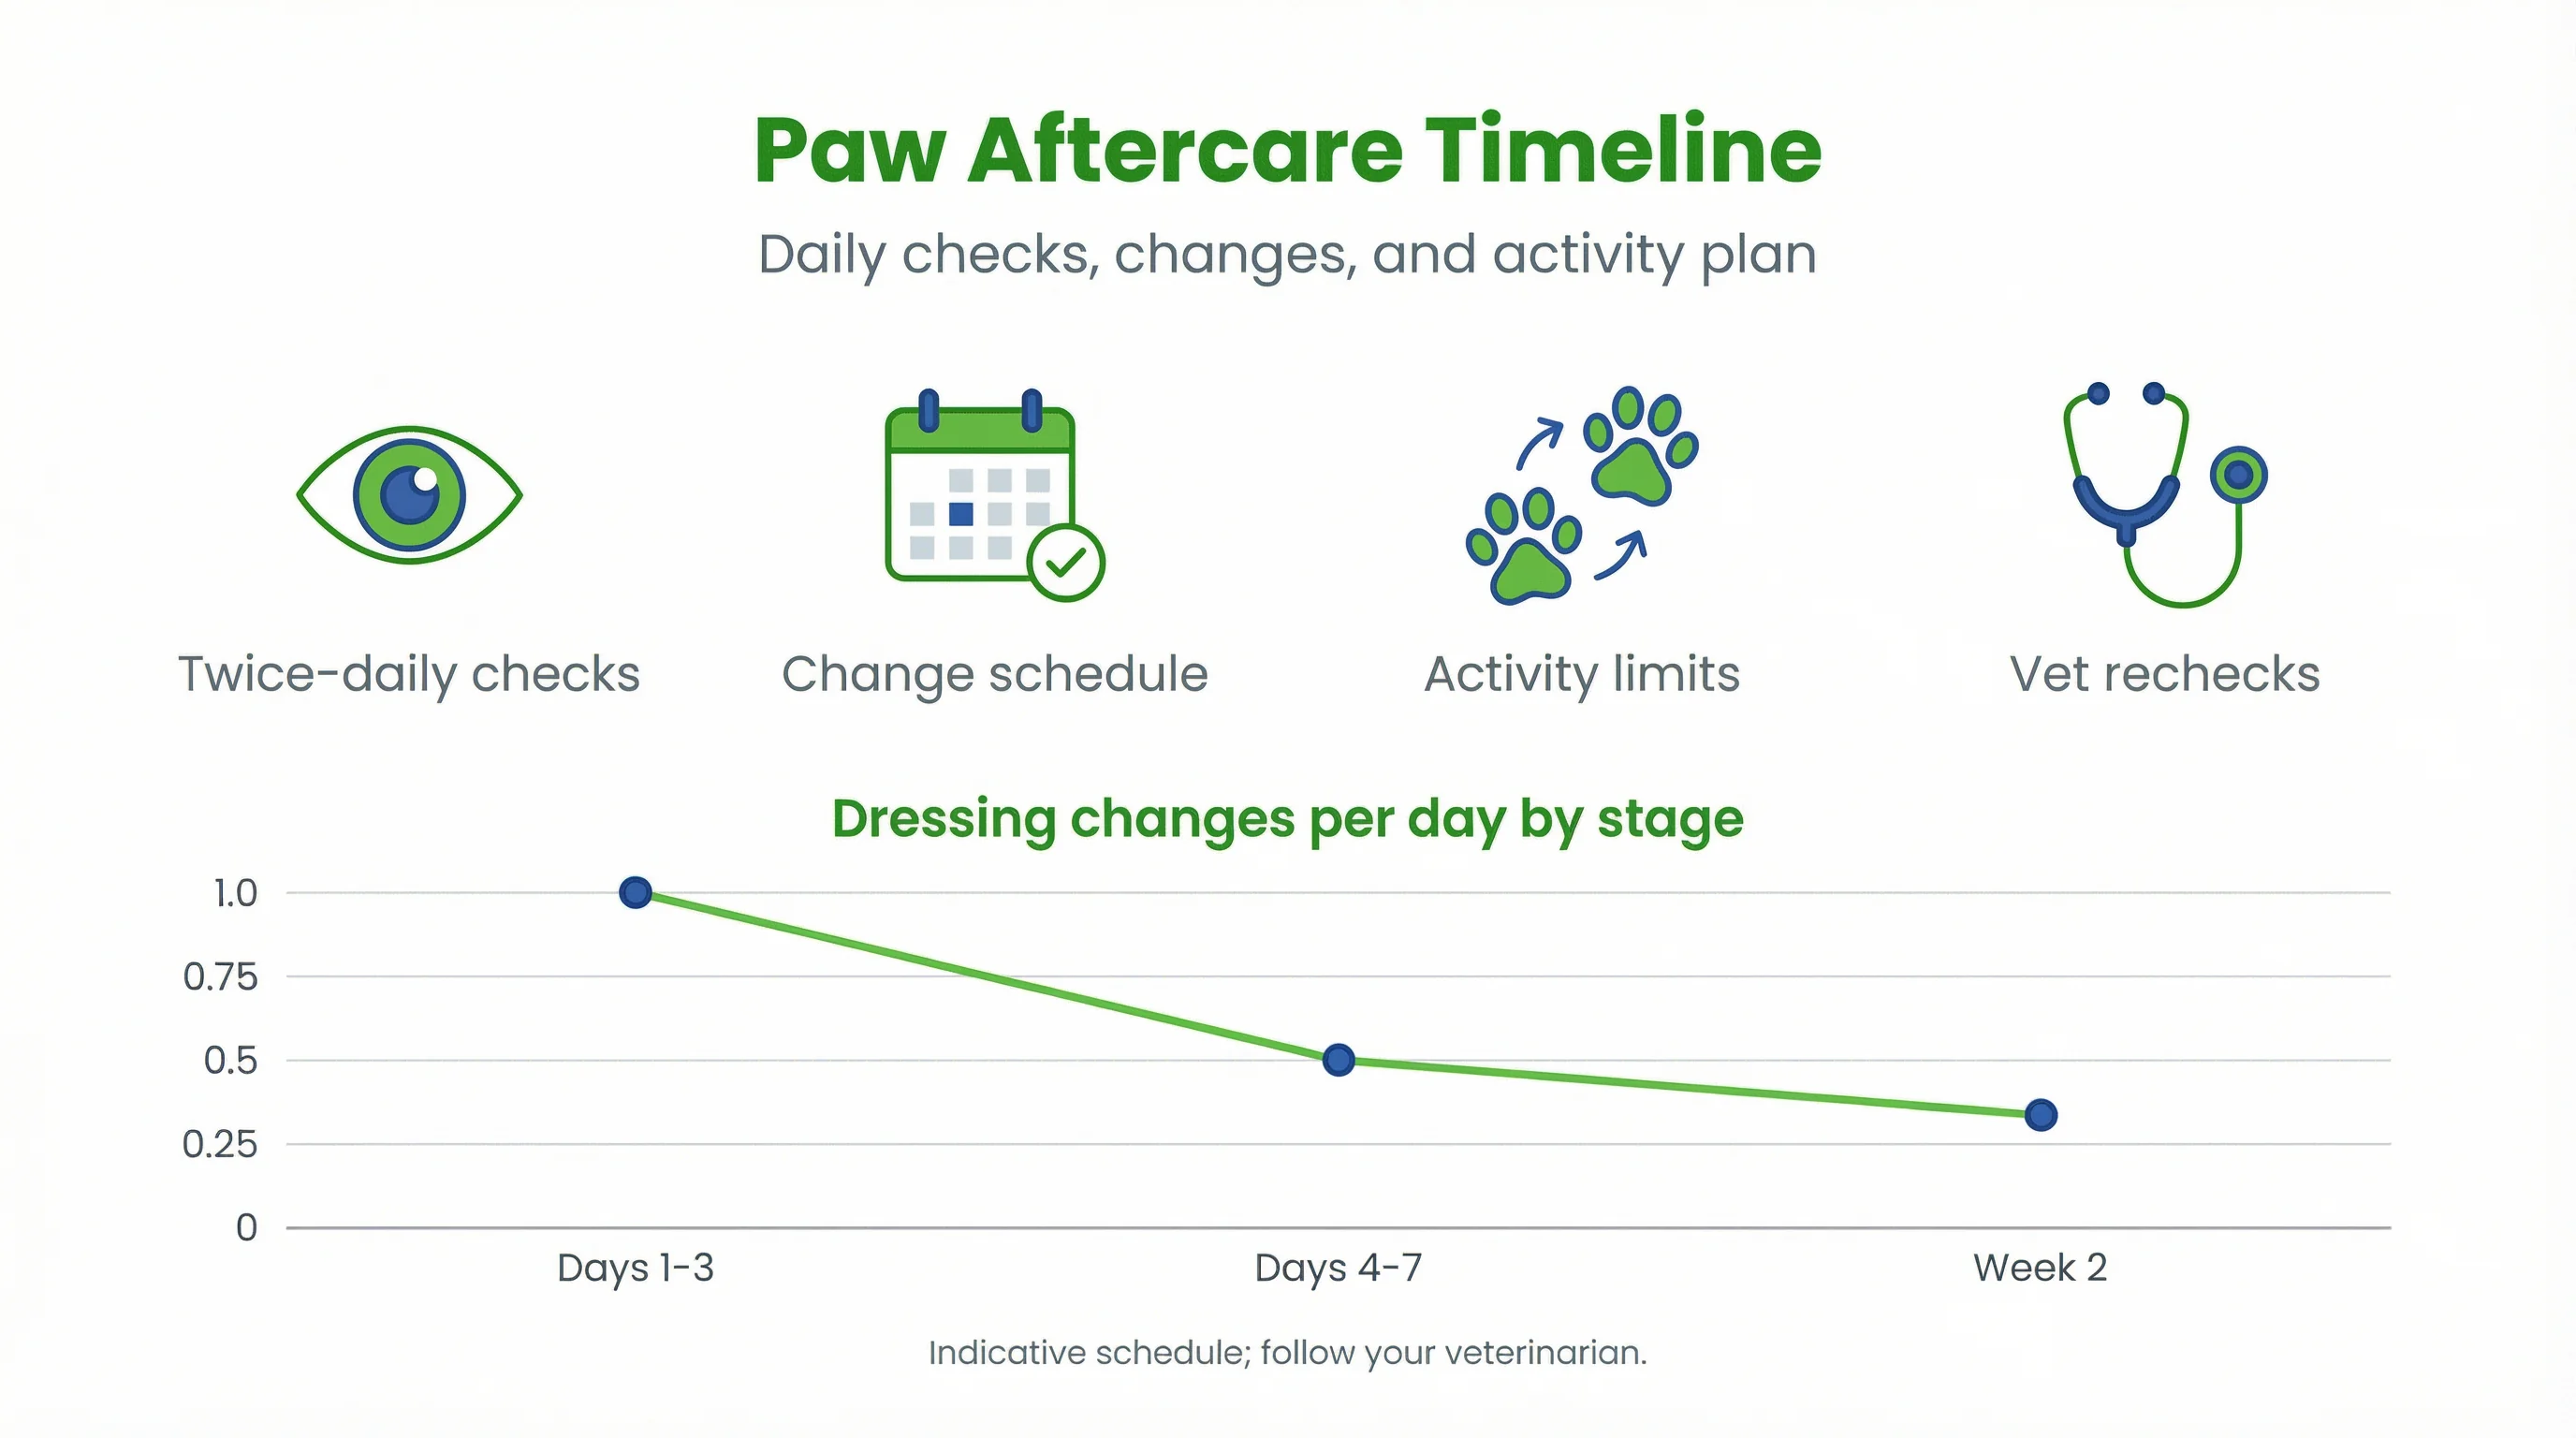
Aftercare Timeline: Rechecks, Dressing Changes, and Activity
Healing depends on consistent hygiene, monitored activity, and timely dressing adjustments. Plan your daily routine to protect the wound at each stage.
Daily checks, odor/watchouts, and change intervals
Inspect twice daily for strike-through drainage, foul odor, swelling, or chewing. Change dressings every 24 hours initially, then extend as exudate decreases, per veterinary advice[2]. Paws pose ongoing contamination and motion risks; diligence during recovery promotes uncomplicated closure[4].
Gradual return to walks and surface selection
Start with short, controlled walks on clean, cool, flat surfaces. Reintroduce rough terrain only after skin integrity improves. For broader recovery strategies, consult Post-injury and surgical recovery with medical booties to align mobility goals with wound stability and traction needs.
Preparedness: Building a Trail‑Ready Paw First Aid Kit
A compact, organized kit reduces stress and speeds intervention. Store it where you can grab it quickly before walks or travel.
Must‑carry items for hikes and travel
- Veterinary-grade HOCl spray, non-adherent pads, sterile gauze squares and rolls
- Cohesive elastic wrap, small blunt scissors, nitrile gloves, tweezers
- Lightweight protective boot, spare socks, disposable bags, and a reflective leash
- Emergency contact card for local veterinarians and poison control
For a complete packing framework, see our Trail kit packing list and prevention tips.
Storage, shelf life, and seasonal add‑ons
Protect solutions from heat and sunlight; follow labeled expiration dates. Replace partially used dressings regularly to maintain sterility. Add summer paw wax for heat glare and winter boot liners for salt exposure. Check your supplies monthly and replenish immediately after use.
Frequently Asked Questions
Is HOCl safe for dogs’ paw wounds?
Yes. Veterinary‑grade hypochlorous acid (HOCl) is non‑stinging and supports wound cleansing by reducing microbial load without damaging healthy tissue. Avoid mixing it with soaps or ointments at the same time.
How tight should a paw bandage be?
Firm enough to keep dressings in place but loose enough to slide a finger under the wrap. Check toes every few hours for swelling, coolness, or discoloration; re‑wrap if circulation seems compromised.
How often should I change my dog’s paw bandage?
Typically every 24 hours, or sooner if the dressing is wet, soiled, or odorous. For heavily draining wounds, your veterinarian may recommend more frequent changes initially.
Can my dog walk outside with a bandaged paw?
Use a protective boot over the bandage to keep it clean and dry. Limit time on rough, hot, or icy surfaces and inspect the bandage and boot after each outing.
When should I see a vet for a paw pad injury?
Seek veterinary care for deep lacerations, persistent bleeding, exposed tissue, embedded objects, severe burns, limping that worsens, foul odor, fever, or if your dog is in significant pain.
Conclusion
Effective paw pad first aid hinges on a disciplined workflow: assess calmly, cleanse with HOCl, manage moisture, wrap with uniform tension, and shield the bandage with a well‑fitted boot. Monitor circulation and odor daily, and escalate to your veterinarian when red flags appear. By following these steps, you promote clean healing and reduce complications. With routine checks, appropriate gear, and thoughtful activity limits, most minor pad wounds recover smoothly. Keep your kit stocked, refine your technique, and practice before emergencies so you can respond confidently when it matters.
References
- M Utzmann et al. (2025). Clinical Signs and Treatment Responses of 14 Dogs With Split Paw Pad Dermatosis. Veterinary …. View article
- NJ Buote (2022). Updates in wound management and dressings. Veterinary Clinics: Small Animal Practice. View article
- I Wiberg (2024). The Influence of Risk Factors on the Health of Dogs' Paws and the Importance of Clinical Evaluation of the Paw in Clinical Practice. 2024 - search.proquest.com. View article
- J Yoo et al. (2023). Application of cold atmospheric microwave plasma as an adjunct therapy for wound healing in dogs and cats. Journal of Veterinary …. View article