
Dog Boots for Recovery vs. Outdoor Use: Fit, Sizing, and Wear Schedules
Dog Boots for Recovery vs. Outdoor Use: Fit, Sizing, and Wear Schedules
A healing paw still needs movement and protection. Choosing the right boot now affects comfort, skin health, and recovery time. The wrong choice may trap moisture, shift loading, and delay healing.
This guide helps you select medical dog booties versus outdoor dog boots with measurable steps. You will learn quick decision rules, dog boot sizing checks, safe wear schedules, and monitoring milestones to reduce moisture buildup and prevent setbacks.
The decision you’re making: recovery booties or outdoor boots for one dog, right now
Scenario focus: a healing paw that still needs daily outings
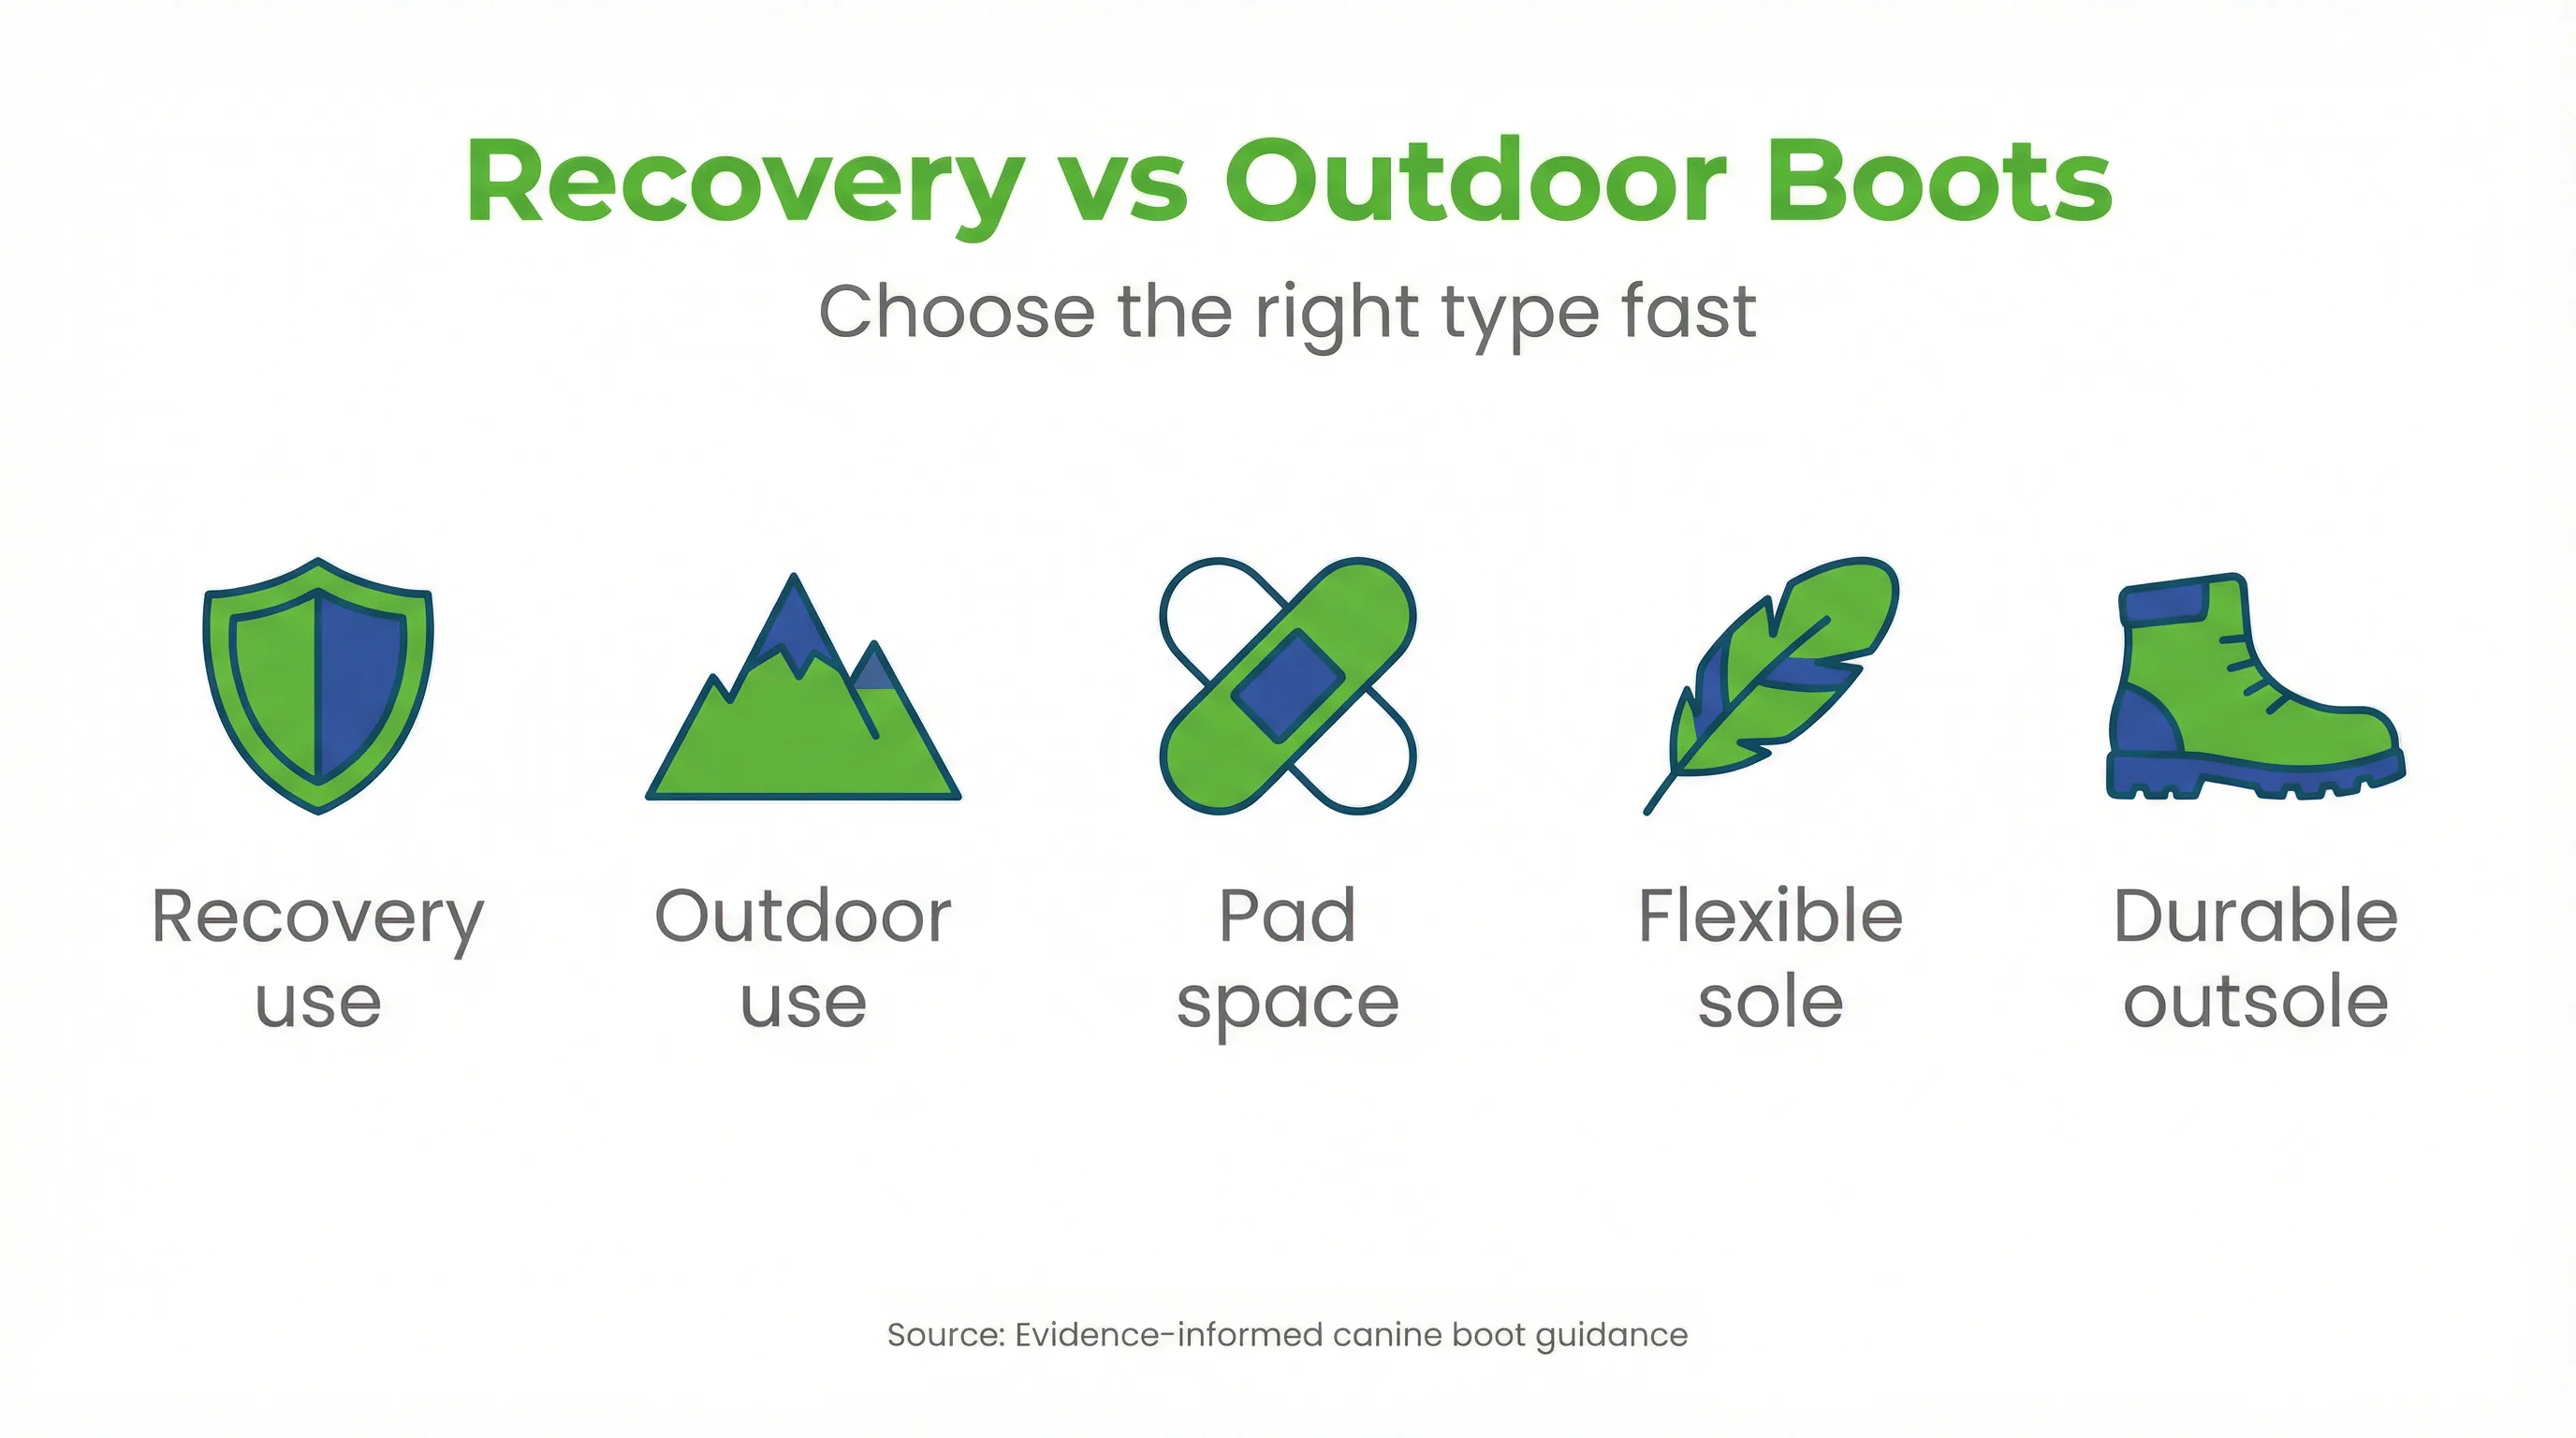
Your goal is dog paw protection without maceration or gait disruption. Medical booties safeguard bandages and sensitive skin indoors. Outdoor boots shield from asphalt, gravel, salt, and wet ground during brief outings, then come off for drying.
Key differences that drive your choice (materials, closure, tread, breathability)
Canine recovery boots favor breathable uppers, soft closures, and flexible soles to protect tissue and dressings. Outdoor designs emphasize rugged tread and abrasion resistance. Boots can alter ground reaction forces, so fit and gradual habituation matter.[1]
Quick decision guide
If the paw has an open wound or sutures, use a breathable medical bootie with inner dressing; avoid rigid soles.
Choose medical dog booties with soft, flexible soles and room for a non-adherent pad. Rigid soles can create pressure points over incisions. Prioritize airflow and gentle closure over heavy tread until the site seals.
If the dog walks on asphalt/gravel without an active lesion, select an outdoor boot with anti-slip sole.
Outdoor dog boots with durable outsoles help manage heat, salt, and rough terrain. Confirm the interior is smooth and dry after each use. Keep walks short while you validate skin response and gait symmetry.
If moisture/licking occurs under the bootie after 60–90 minutes, shorten time and add an absorbent dressing.
Moisture macerates skin. Reduce session duration, increase ventilation breaks, and insert an absorbent, non-adhesive pad. Inspect interdigital spaces for whitening or wrinkles. Adjust closures to allow airflow without slippage.
If new limping appears with an outdoor boot, pause use and trial a shorter, lighter fit or a medical bootie.
Uneven loading may signal poor dog boot sizing or excessive sole stiffness. Stop, reassess width and length, and retest movement. Consider returning to a flexible medical bootie while you refine the fit.
If you need traction indoors after surgery, use a medical bootie with flexible sole and a grippy sock.
Flexible soles help maintain normal paw placement on smooth floors. If additional traction is required, layer an anti-slip sock over the bootie briefly. Recheck toes to prevent curl or pressure marks.
If the weather is wet or snowy, use an outdoor boot outside and a dry medical bootie indoors for recovery.
Wet conditions increase skin-softening risk. Keep outdoor sessions brief, remove boots immediately, pat-dry the paw, then switch to a breathable medical bootie indoors. Validate dryness before redressing.
If there are mild environmental allergies without lesions, use an outdoor boot outside; check pads after each walk.
Barrier protection may reduce allergen contact. After walks, inspect for redness between toes. Rinse and dry thoroughly, and limit wear to outings to minimize humidity under the boot upper.
Fit and sizing: how to measure and validate the fit
Correct measurement: width of the paw in load and length to the longest nail
Measure width with the paw fully weight-bearing on paper, then length from heel pad to the longest nail tip. Favor a snug width that prevents rotation, without compressing toes or dressings.
3-minute test: heel strike, turning, and stairs
After donning boots, observe three minutes of walking, tight turns, and one flight of stairs. Watch for toe splay, knuckling, or stumbles. A good fit stays aligned through each movement without twisting.
Signs of poor fit: rotation, carpal rub, clawed toes, skin marks
Boot spin, carpal strap chafing, clawed or curled digits, or immediate indentations indicate misfit. Reassess dog boot sizing by adjusting closures or selecting a different size or profile to relieve pressure.
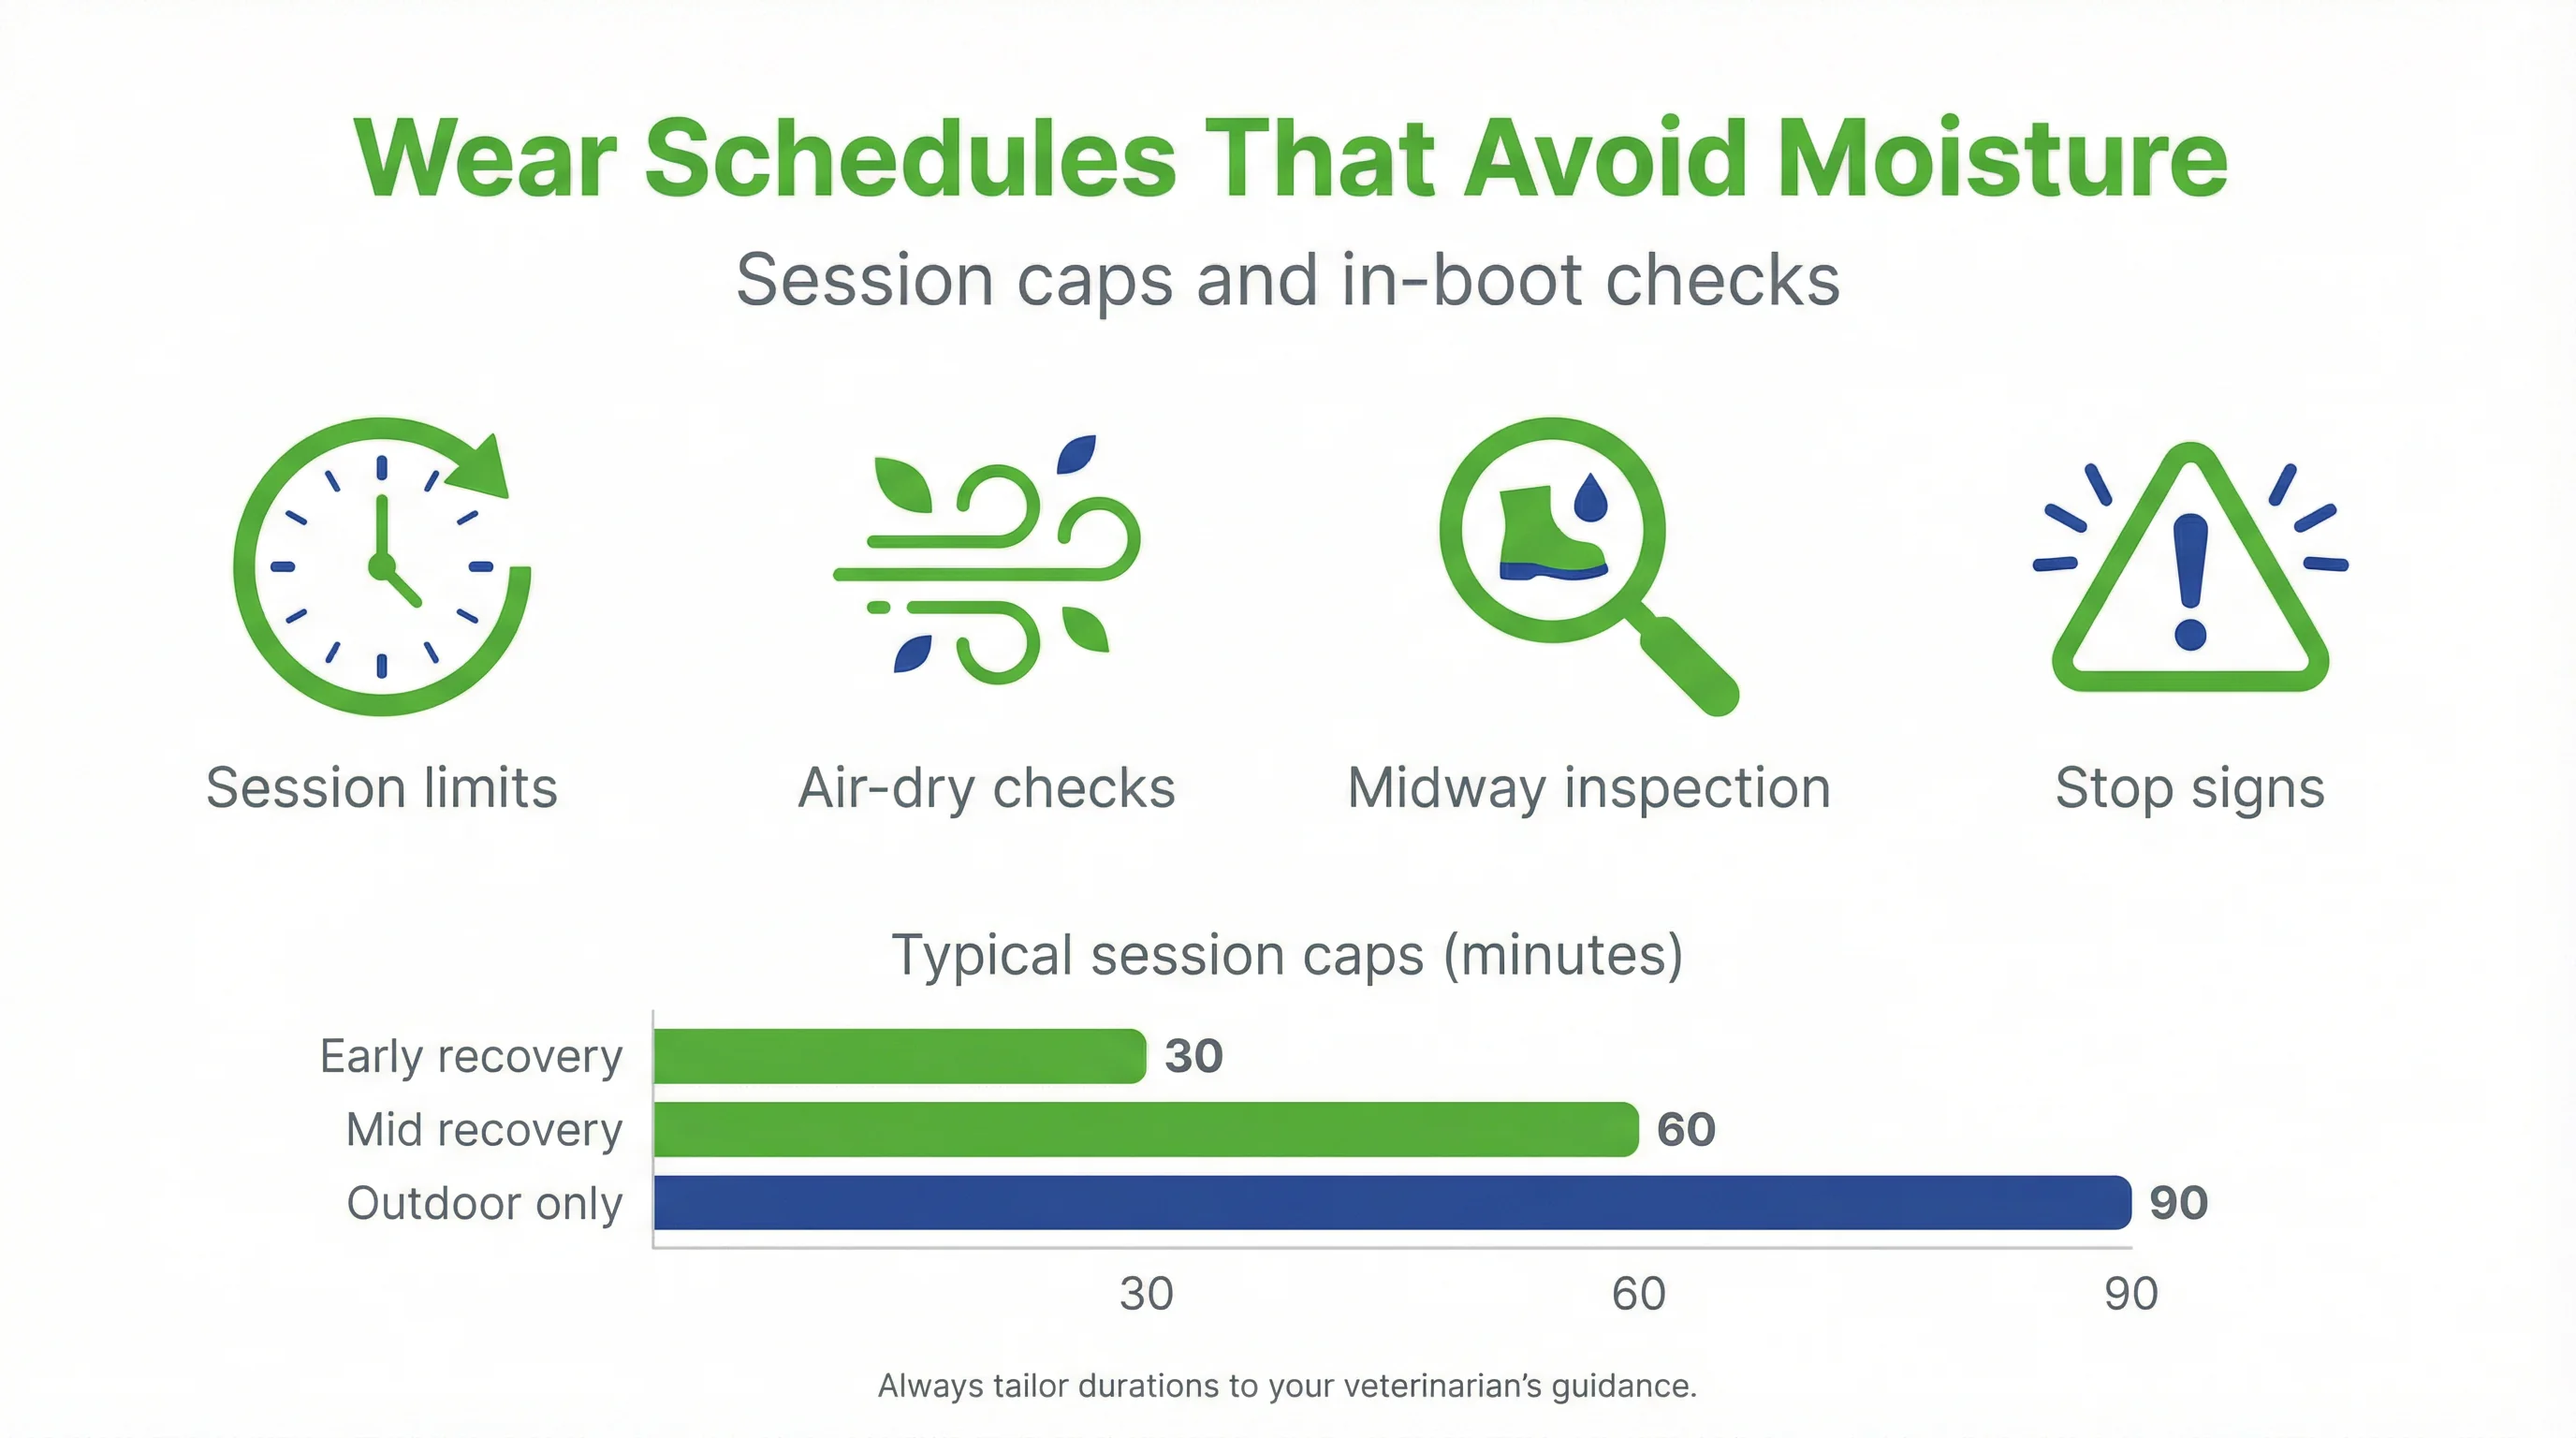
Wear schedules that avoid moisture and rubbing
Acute phase (days 1–7): 20–45 minutes per session with ventilation between changes
Limit sessions to protect circulation and keep dressings dry. Alternate wear with open-air time until the skin feels cool and dry. Many owners find Healers Medical Dog Booties helpful during this phase for breathable coverage.
Subacute phase (weeks 2–4): 60–90 minutes max with a mid-check
As tenderness decreases, extend wear cautiously. Midway, remove the boot to assess warmth, dampness, and any odor. Research suggests boots can change stance time and loading, so watch for subtle gait shifts.[4]
Maintenance/Outdoor: walks of 20–40 minutes with complete drying after outing
For routine outings, cap duration to reduce trapped humidity. After returning, remove boots immediately, rinse debris if needed, and dry thoroughly, including between toes. Resume indoor recovery booties only when the paw is fully dry.
How to alternate: dressing + medical bootie indoors, outdoor boot outside
Indoors, use a breathable medical bootie over a secured dressing. For sidewalks or trails, switch to a lightweight outdoor model temporarily. Reinforce with brief habituation periods to reduce kinetic disruption.[3]
Monitoring and follow-up
At 7–14 days: signs indicating progress or plan adjustment
Expect reduced licking, normalizing gait, and dry skin without whitening. Adjust if you see new limping, damp odor, or redness at strap lines. Revisit width, closure tension, and session length accordingly.
At 4–8 weeks: markers of functional recovery
Look for full weight-bearing on varied surfaces, confident turning, and no post-walk skin changes. At this stage, many dogs transition to outdoor-only boots for hazards and discontinue indoor recovery booties.
Practical safety boundaries
When to remove immediately
Remove boots if you notice wetness, warmth, swelling, sudden lameness, or persistent boot spin. Stop use if skin blanches or wrinkles, or if straps leave impressions after five minutes of removal.
Session and daily time caps
In recovery, cap single sessions at 90 minutes and total daily wear near three hours, with full air-dry intervals. Outdoor-only use may extend slightly, provided the paw remains dry and unabraded.
Hygiene: drying, dressings, and skin
Use a non-adherent pad, change if damp, and pat-dry pads and webbing after walks. Consider an HOCl wound cleanser for gentle cleaning. Ensure complete drying before re-dressing to prevent maceration.
State of the evidence: what research suggests
Breathability, moisture control, and maceration risk
Evidence indicates boots can modify contact and pressure, making moisture management essential to avoid skin softening. Select breathable materials and time-capped wear to reduce risk while protecting healing tissue.[1]
Traction and slip prevention in recovery
Studies show canine boots influence stance time and kinetics, which may alter traction demands on smooth floors. A flexible, non-slip sole may support safer transitions across surfaces during rehabilitation.[4]
Medical materials and wound care
Work on paw devices highlights protective benefits and calls for adequate habituation. Pairing breathable fabrics with non-stick dressings may support healing while limiting friction and pressure on vulnerable sites.[3]
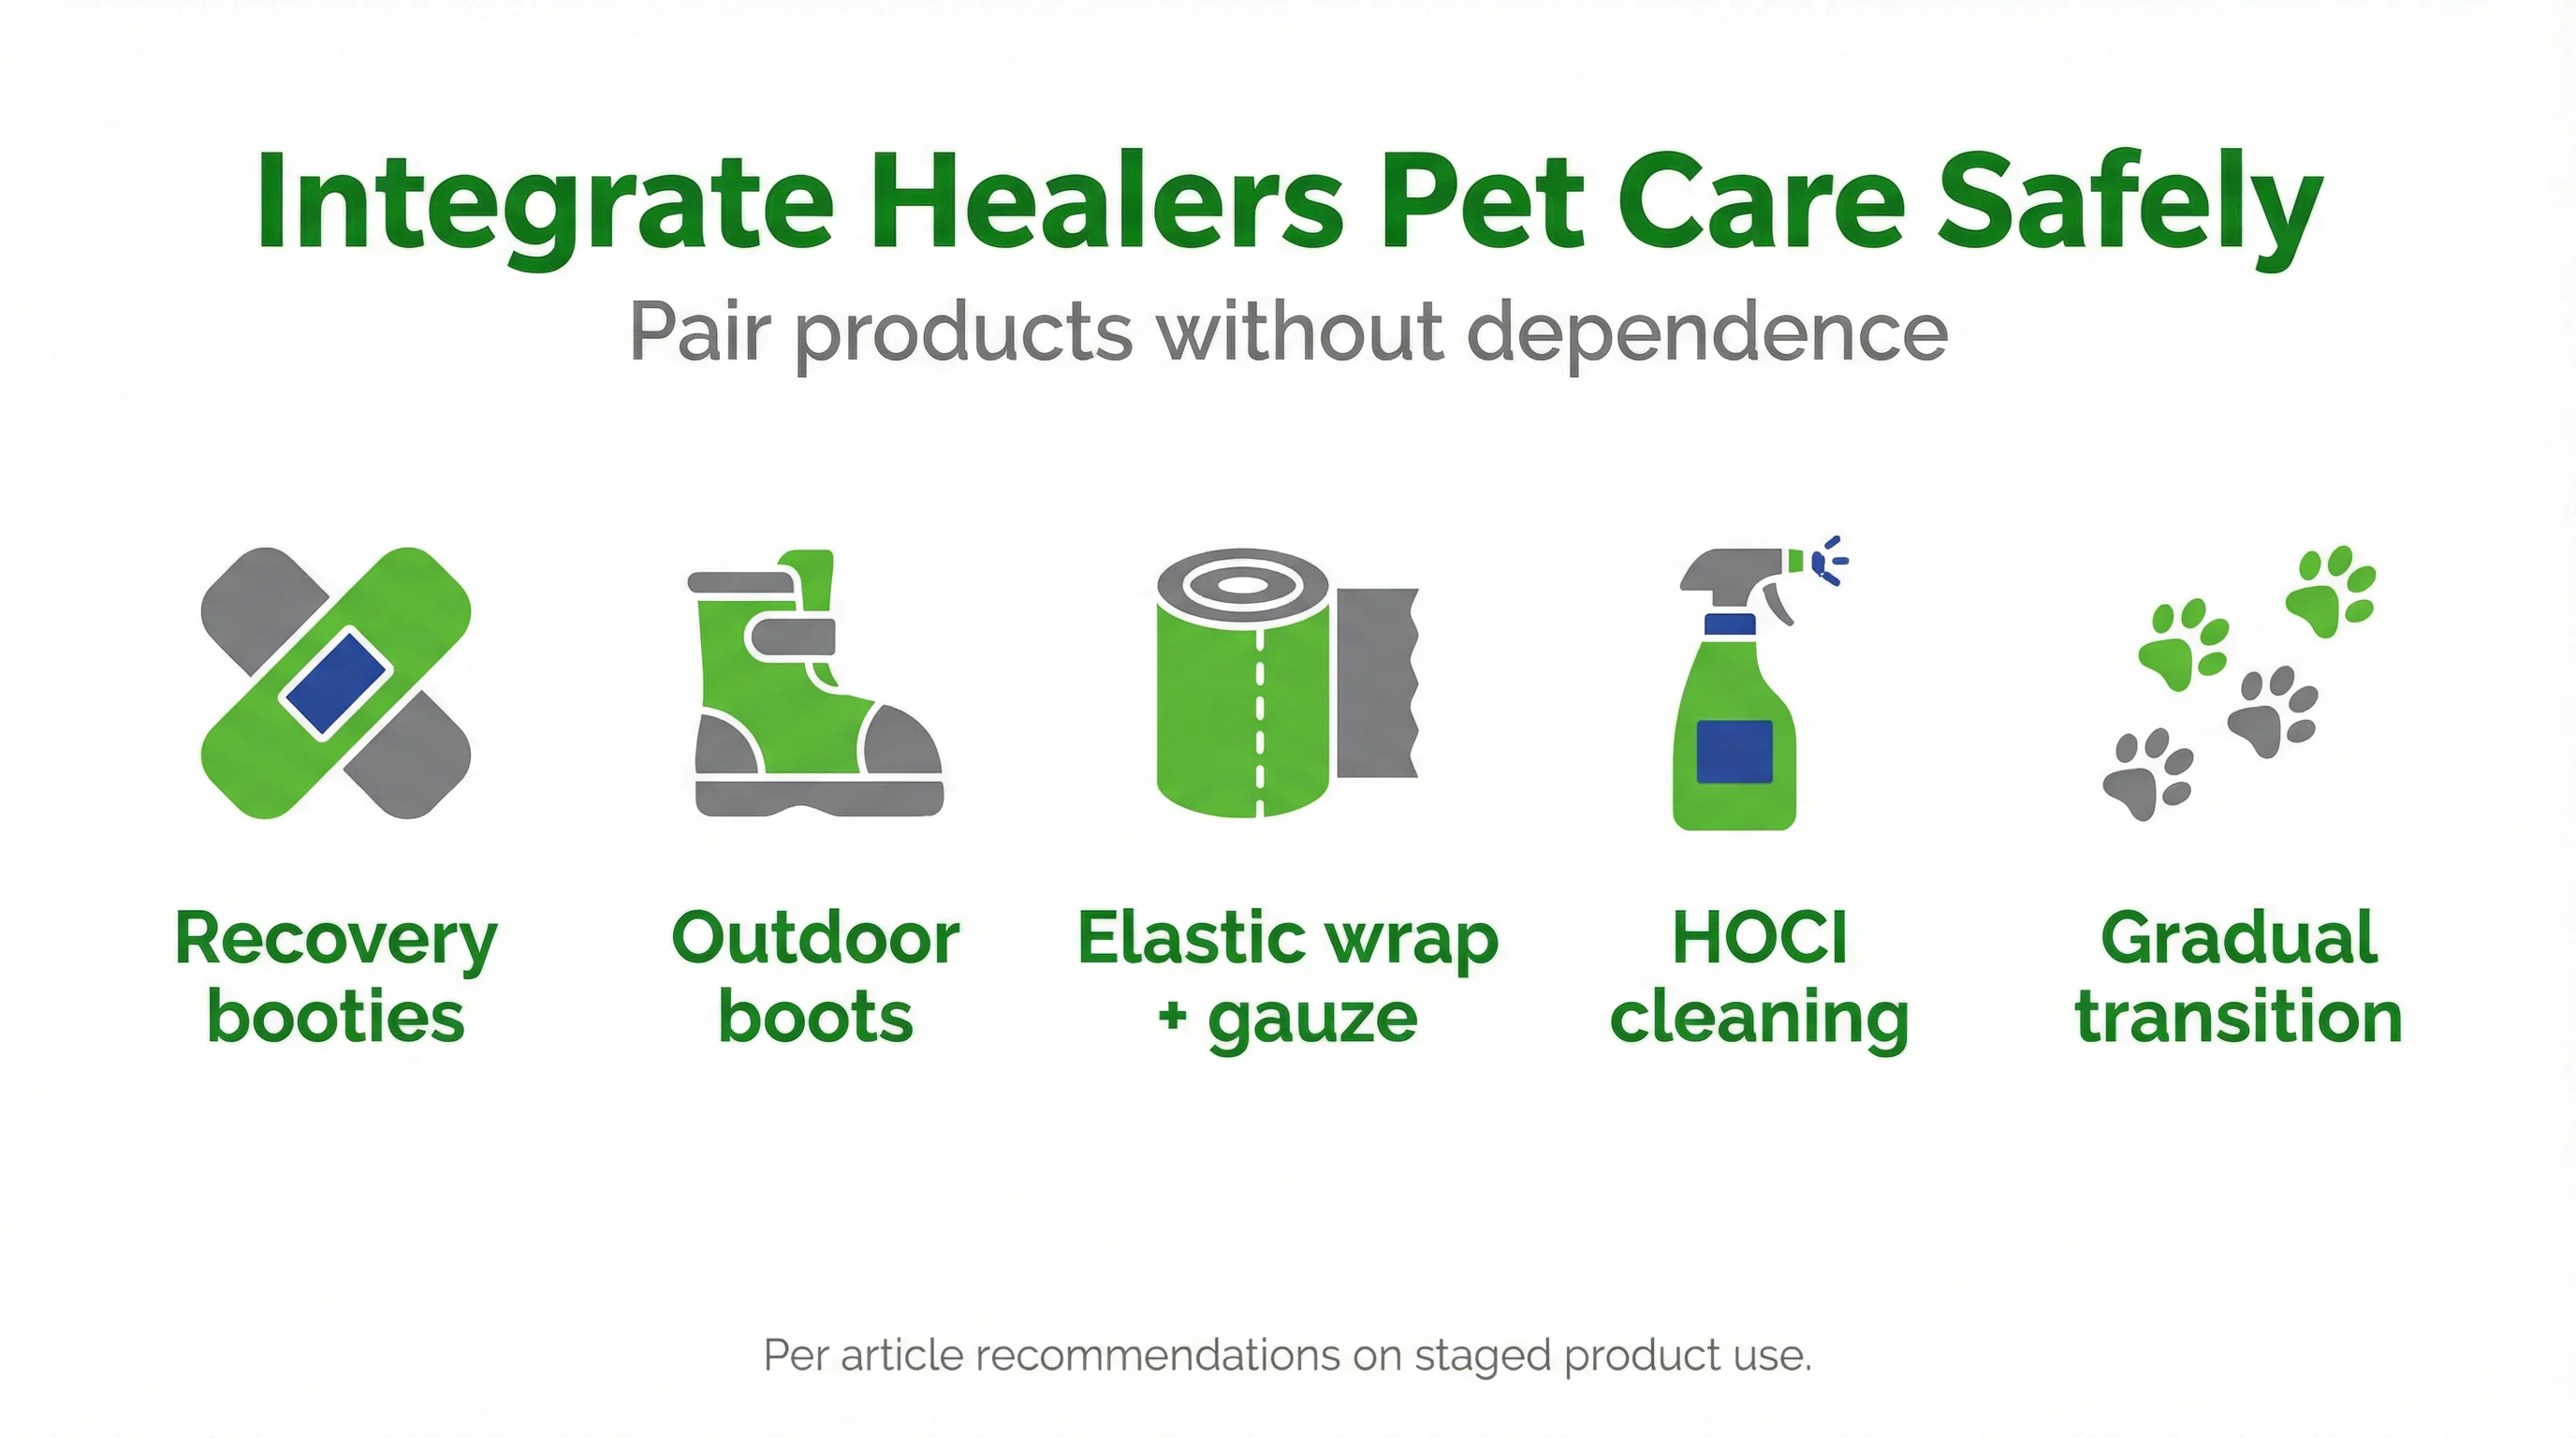
How to integrate products from Healers Pet Care without creating boot dependence
When to choose Healers Medical Dog Booties versus Urban Walkers III
Select canine recovery boots with breathable uppers and flexible soles for indoor healing or over dressings. Choose rugged outdoor models for brief exposure to hazards. As healing advances, reduce indoor wear to avoid humidity.
Complementary supports: elastic wraps and HOCl cleansing
Use an Elastic Wrap Leg Bandage (with Gauze) to secure dressings under booties without over-tightening. For cleaning, a gentle HOCl spray helps manage bioburden while preserving granulation, paired with timely drying to prevent maceration.
Frequently Asked Questions
How long can a dog wear medical recovery booties indoors?
Evidence-informed practice suggests 20–90 minutes per session with full air-dry checks between sessions. If the paw feels damp or looks wrinkled, shorten sessions and change the dressing.
What’s the main sizing error with dog boots?
Choosing for length but ignoring width. Measure width in full weight-bearing and confirm no toe curl or boot spin during a 3‑minute movement test.
Can outdoor boots be used over bandages?
They can in short, supervised outings if the fit is not compressed. Prefer breathable medical booties over dressings indoors to reduce moisture build-up.
How do I prevent moisture build-up in recovery booties?
Use an absorbent, non-adhesive pad, schedule ventilation breaks, and ensure the boot’s upper is breathable. Replace damp dressings promptly.
When should I switch from recovery booties to outdoor boots?
When the wound is closed, there is no discharge, and your dog bears weight without guarding. Start with short walks and reassess skin after each outing.
Related resources
Visit the canine injury recovery hub to view full plans by injury type
For structured timelines, skin checks, and return-to-activity progressions, see the orientation guide at Injury Recovery for Dogs: A Pet Parent’s Orientation Hub. You can also explore moisture-safe cleaning at Cleaning Dog Wounds at Home with HOCl: Step‑by‑Step and Safety Checks and itch control options in Hot Spots and Itchy Lesions: Fast Relief Without the Cone of Shame.
Thoughtful selection, precise dog boot sizing, and disciplined wear schedules can protect healing tissue while avoiding moisture buildup. Introduce boots gradually, monitor skin and gait, and taper indoor use as recovery stabilizes. For seasonal surfaces and temperature extremes, integrate outdoor boots briefly and prioritize breathability at home. Balanced, evidence-informed choices may support a smoother, safer return to normal activity.[2]
References
- B Bieber et al. (2022). Changes in ground reaction forces and center of pressure parameters of paws when wearing dog boots in dogs. Frontiers in veterinary …. View article
- B Bieber (2021). Veränderung der Bodenreaktionskräfte der gesamten Extremität sowie ausgewählter COP-Parameter der Pfote durch das Tragen von Pawz R Rubber Dog …. University of Veterinary Medicine, Vienna …. View article
- K Shorter et al. (2019). Ground force kinetic adaptations associated with canine boots. Biologia Futura. View article
- C Lawman et al. (2018). Ground force kinetic adaptations associated with canine boots. CSF 2018: 6th Canine Science …. View article


